


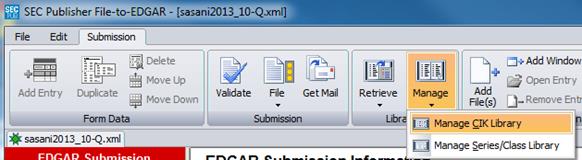
File-to-SEC’s CIK Library feature stores filer information for quick retrieval and entry into submissions. Write access to the CIK Library can be password protected. However, the CIK Library may be read and filer information may be entered into a submission through it without a password. Multiple users may access the same CIK Library at the same time. To access the CIK Library, click Manage CIK Library from the following menu:
o
Submission
Menu:
Manage > Manage CIK Library
The following dialog box will appear:
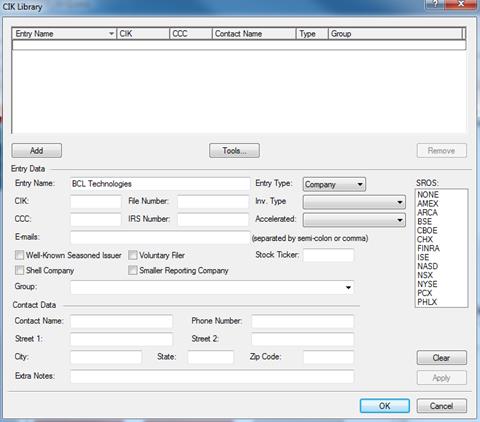
Depending on whether or not any entries have been added previously to the CIK Library, this dialog may contain no data.
Tip: There is no limit to the number of client information that can be saved in the CIK Library.
This area contains all the information for each CIK Library entry.
a. Add
Pressing the ‘Add’ button will add an entry to the library with the data in the fields.
b. Remove
Press the ‘Remove’ button to delete the selected entry from the list.
c. Apply
When changes are made to an entry’s information, press the ‘Apply’ button to apply them.
d. Company
Enter the name of the company to which the filer data belongs. This data will be displayed in the Company column.
e. CIK
Enter the CIK of the filer. This data will be displayed in the CIK column.
f. CCC
Enter the CCC of the filer. This data will be displayed in the CCC column.
g. Contact
Enter the contact name for the filer.
h. Phone Number
Enter the contact’s phone number for the filer.
i. SROS
Choose the SROS used by the filer.
j. Comments
Enter any
additional comments for the filer. Comments entered here are for
your reference only and will not be included in any submission to
the SEC.
Clicking this button will open the tools menu.
![]()
a. Change Full Access Password
Choosing this option will allow you to change the password that grants full access to the Library. The following dialog box will appear:
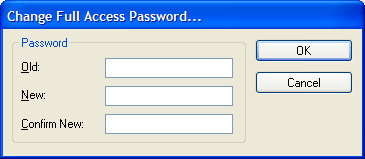
i. Old
Enter the previous full access password into this field.
ii. New
Enter the new full access password into this field.
iii. Confirm New
In this field, re-enter the new full access password to confirm that the new password is correct.
Press the ‘OK’ button to accept the new password.
b. Change Read Access Password
Choosing this option will allow you to change the password that grants read access to the Library. By default, the program does not require a password to read the Library. When this option is selected, the following dialog box will appear:
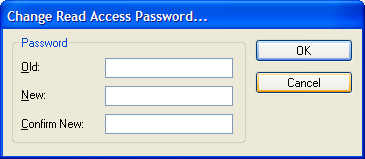
This dialog operates in exactly the same manner as the dialog from which the Full Access password may be changed.
c. Import from CSV files
Filer
information can now be imported into the library located inside SEC
Publisher’s filing module from a .CSV (comma-separated values)
document that can be created using Microsoft Excel.
The .CSV document to be imported must be created in the following
way:
i. Open Microsoft Excel
ii. Enter the necessary information. There are two kinds of information to enter:
A: The column headers
These headers are placed on the first row of the spreadsheet and each column should have only 1 keyword. The table below shows the fields in the library and the keyword(s) that correspond to the Library field. If there are multiple keywords for a field, like Contact, only use one of the keywords in your file. Using more than one keyword will confuse the system.
|
Library Field |
Keyword(s) |
|
Company |
Company or Company Name |
|
CIK |
CIK |
|
CCC |
CCC |
|
Contact |
Contact, Contact Name, or Name |
|
Phone Number |
Number, Phone, Phone Number |
|
Comments |
Comments |
|
SROS |
SROS |
Note: The CIK and CCC columns are required, so please ensure that there are columns with these keywords present in the document.
B: Company information
Each company entry takes up one row. The data for each company should be entered in the same column as the Column name that describes it. For example, a company’s CIK number belongs in the column with the keyword “CIK”.
3.
When finished, save the file. To save it, follow these
steps:
a. Go to drop down option File > Save As. The following menu appears:
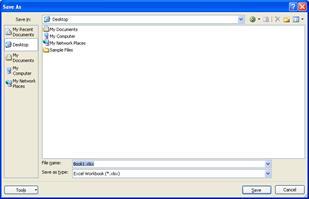
b. Navigate to the location where you want the file to be saved.
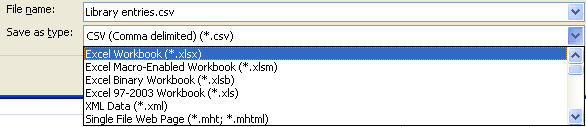
c. Open the ‘Save as type’ drop-down. The screenshot below shows how the drop down looks like when open:
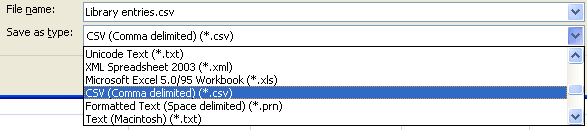
d. Navigate to and select the CSV (Comma-separated value) (.csv) option. The location of the CSV option in the list is shown below.
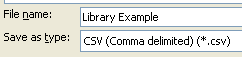
e. Specify a name for the file. An example filename is shown below.
f. Click the ‘Save’ button.
After entering the desired information and adding the filer to the
Library list, select the filer in the list and click the ‘OK’ button. The filer information
will automatically populate the applicable fields in the submission
information.
File-to-SEC’s Library feature also stores series and class information for quick retrieval and entry into submissions. Write access to the Series/Class Library is password protected. However, the Series/Class Library may be read and series and class information may be entered into a submission through it without a password. Multiple users may access the same Series/Class Library at the same time.
To access the Series/Class Library, use the following method(s):
o
Drop-down
Menu:
File > Series/Classes
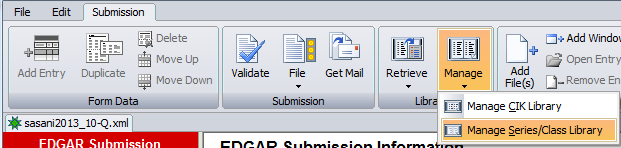
o Series/Class Existing Menu:
Library Button
Clicking ‘OK’ without entering a password will also open the Series/Class Library. However, you will only be able to read the Series/Class Library entries and put existing entries into a submission. A Read-Only password may also be set by you and will be described later in this chapter.
Click ‘OK’ to enter the Series/Class Library or the ‘Cancel’ button to return to the submission. When ‘OK’ is pressed, the following dialog box will appear:
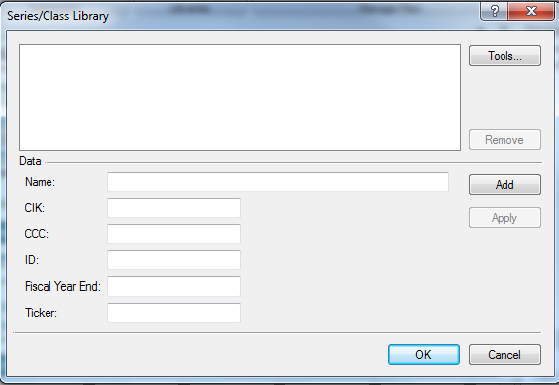
Depending on whether or not any entries have previously been added to the Series/Class Library, this dialog may contain no data.
This area contains all the information for each library entry.
Pressing the Add button will open the following menu:

Different choices will be available depending on the current list box selection. For example, if the current list box selection is a Trust, only New Trust and New Series will be available.
a. New Trust
Choosing this option will create a new trust. New trusts can be created regardless of the list box selection. If ‘New Trust’ is selected, the following dialog box will appear:
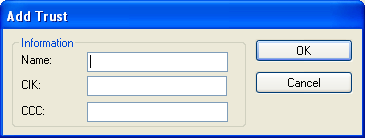
Information. This area contains the information that will be used for the trust.
i. Name
Enter the name of the trust. The trust name will not be submitted to the SEC and is for personal reference only.
ii. CIK
Enter the CIK of the trust. The trust CIK will not be submitted to the SEC and is for personal reference only.
iii. CCC
Enter the CCC of the trust. The trust CCC will not be submitted to the SEC and is for personal reference only.
Click ‘OK’ to add the new trust to the list.
b. New Series
Choosing this option will create a new series. New series can be created regardless of the list box selection. If there are no trusts within the library, however, new series cannot be created. The series will be created under the trust that is selected (or the trust that is associated with the selected series or class). When ‘New Series’ is selected, the following dialog box will appear:
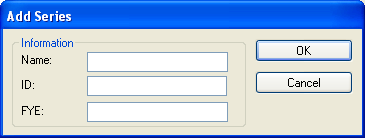
Information. This area contains information about the series.
i. Name
Enter the name of the series. The series name will not be submitted to the SEC and is for personal reference only.
ii. ID
Enter the ID for the series.
iii. FYE
Enter the fiscal year end for the series. The series fiscal year end will not be submitted to the SEC and is for personal reference only.
Click ‘OK’ to add the new series to the trust.
c. New Class
Choosing this option will create a new class. New classes can be created only if a series or class is selected in the list box. Classes cannot be directly added to trusts. The class will be created under the series that is selected (or the series that is associated with the selected class). When ‘New Class’ is selected, the following dialog box will appear:
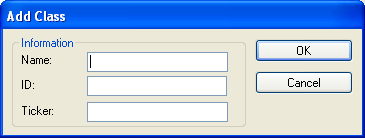
Information. This area contains the information for the class.
i. Name
Enter the name of the class. The class name will not be submitted to the SEC and is for personal reference only.
ii. ID
Enter the ID for the class.
iii. Ticker
Enter the ticker for the class. The class ticker will not be submitted to the SEC and is for personal reference only.
Click ‘OK’ to add the new class to the series.
Press the ‘Remove’ button to delete the selected entry from the list. Pressing ‘Remove’ will also remove any entries that are associated with the selected entry. For example, removing a trust will remove all series and classes from the list that apply to that trust. Removing a series will also remove all classes from the list that apply to that series. Removing a class from the list will only remove the class entry.
When changes are made to an entry’s information, press the ‘Apply’ button to apply them.
This field displays the name of the trust, series, or class to which the data belongs. This data will be displayed in the Name column.
This field displays the CIK of the trust. You cannot edit this field if the current selection is a series or class. Series and classes display the CIK of their trust.
This field displays the CCC of the trust. You cannot edit this field if the current selection is a series or class. Series and classes display the CCC of their trust.
This field displays the ID of the series or class to which the data belongs. This field will be empty when a trust is selected.
This field displays the fiscal year end for the series. This field will be empty when a trust is selected. You cannot edit this field if the current selection is a class. Classes display the fiscal year end of their parent series.
This field displays the ticker for the class. This field will be empty when a trust or series is selected.
Clicking this button will open the tools menu.
![]()
a. Change Full Access Password
Choosing this option will allow you to change the password that grants full access to the Series/Class Library. The following dialog box will open:
i. Old
Enter the previous full access password into this field.
ii. New
Enter the new full access password into this field.
iii. Confirm New
In this field, re-enter the new full access password to confirm that the new password is correct.
Press the ‘OK’ button to accept the new password.
b. Change Read Access Password
Choosing this option will allow you to change the password that grants read access to the Series/Class Library. By default, the program does not require a password to read the Series/Class Library. When this option is selected, the following dialog box will open:
This dialog operates in exactly the same manner as the dialog from which the Full Access password may be changed.
c. Import from CSV
Series and class data can be imported into File-to-SEC from a .csv file. The data must be copied to the clipboard from any application that generates CSV data, such as Microsoft Excel. The file must be formatted in a particular manner, as described below:
The first row in the CSV is considered to be the names for the columns. Column names are case insensitive. These column names must contain keywords. Refer to the following table for a list of the keywords and the matching data.
|
Column Keyword(s) |
Corresponding Data |
|
ID |
Series and Class ID |
|
SID |
Series ID |
|
Series ID |
Series ID |
|
CID |
Class ID |
|
Name |
Trust, Series, and Class Name |
|
Trust Name |
Trust Name |
|
Series Name |
Series Name |
|
Class Name |
Class Name |
|
Contract Name |
Class Name |
|
CIK |
Trust CIK |
|
CCC |
Trust CCC |
|
FYE |
Series Fiscal Year End |
|
Fiscal |
Series Fiscal Year End |
|
Year |
Series Fiscal Year End |
|
End |
Series Fiscal Year End |
|
Ticker |
Class Ticker Symbol |
|
Symbol |
Class Ticker Symbol |
The columns that must be present in the CSV data to create a database are ID and Name. When the data is formatted with the properly named columns, copy it to the clipboard and choose this option. The data will be imported into the Series/Class Library.
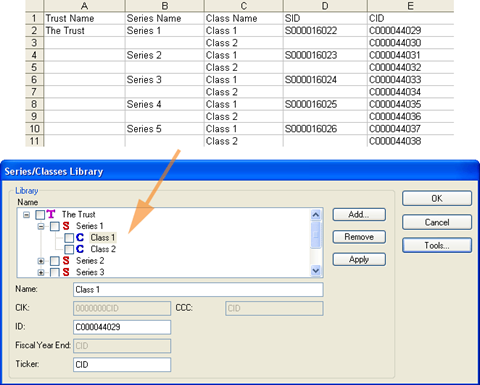
When all the desired information has been added to the Series/Class Library database, you are ready to add series and classes to the submission. To do this, click on the box next to the series, classes and/or trusts that are to be added to the submission. Then, click the OK button. The series or class information will automatically populate the applicable fields in the submission.
Related Topics
©1999-2022 BCL Technologies. All Rights Reserved. Unauthorized duplication or distribution prohibited.
| Converted from CHM to HTML with chm2web Standard 2.85 (unicode) |