


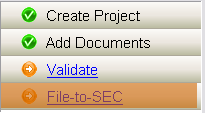
From SEC Publisher, you can start the filing process by using one of the following method(s):
SEC > File-to-SEC…
![]()
If at least one EDGAR HTML and/or EDGAR ASCII file(s) in the project has not been validated, then the following screen will appear:
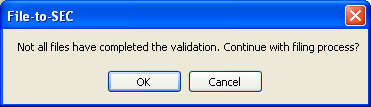
To continue the filing process, click ‘OK’. To return to the main SEC Publisher interface, click ‘Cancel’.
If you have at least one filing associated with the current project, then the following menu appears:
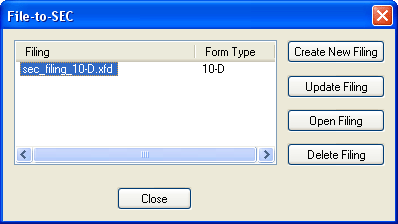
This button allows you to create a new Filing to submit to the SEC.
This button allows you to add or delete files from the filing.
3. Open Filing
This button allows you to open an existing filing. This will load the submission interface.
This button allows you to delete the selected filing.
5. Close
This button allows you to close this menu.
Note: If this is the first time that the filing process has been started with the current project, then File-To-SEC will start the process to create a New Filing (see ‘New Filing’ for more information).
To start the process, you will be prompted to enter the following information:
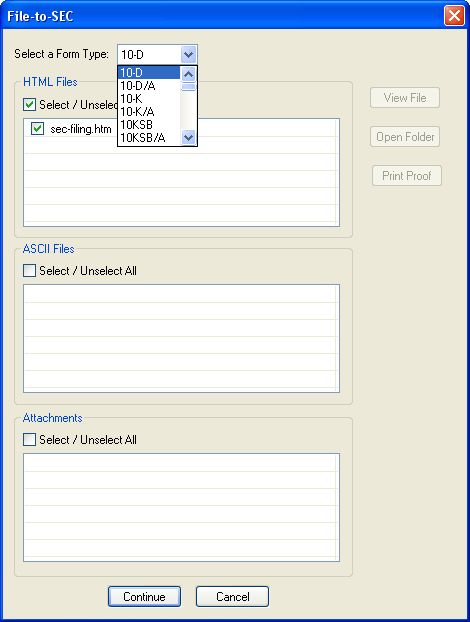
1. Select a form type
The drop down menu allows you to access all allowable forms available under SEC's regulations. Simply select the specific filing you are about to create. For your convenience, SEC Publisher will default to the last form type selected.
2. Select the document(s) you want to file
The interface will display a set of EDGARized and non-EDGARized files associated with the SEC Publisher project. They can be in EDGAR HTML, EDGAR ASCII or as an attachment, depending on what format(s) you chose during the conversion process. There are options to select a single file, a set of files or all files to be included in the filing.
Tip: You can mix and match ASCII type files, HTML type files and Attachment files in the same filing.
Tip: You do not need to know what type of filing they are working on before they EDGARized the files.
3. Preview the document
The interface allows preview options for your convenience:
a. View File
View the selected file in the default browser for that file.
b. Open Folder
Show the folder in which this file resides.
c. Print Proof
If you are not ready to complete the filing and would like to create a PDF version of the selected EDGARized file, then you can press this button to create PDF.
Note: View File and Print Proof will not be available when a PDF file is selected, since Acrobat cannot be opened when SEC Publisher is running.
At this point, assuming you are ready to move forward, simply select ‘Continue’. If you want to go back to the SEC Publisher main interface then select ‘Cancel’.
If you select ‘Continue’, then the following screen will appear:
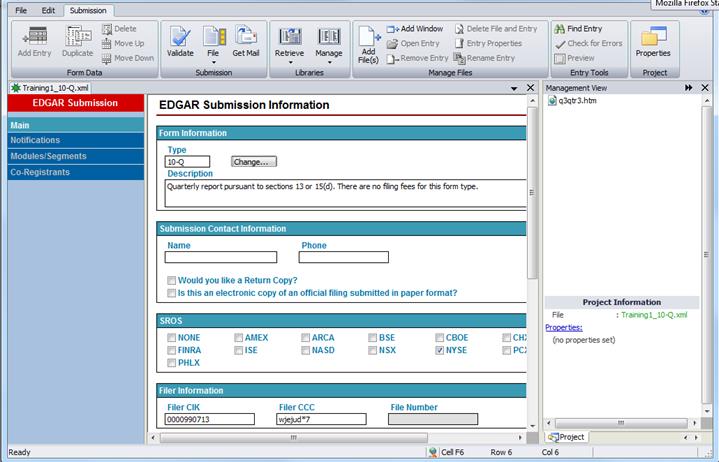
This is the Main page for the File-to-SEC module, which contains the basic fields that are present on every form type.
The following is a list of all information fields that can appear on the main screen of the submission. Fields may or may not be required, depending on the selected form. Fields may or may not appear on all form types and may be dependent on the values in other fields.
This area contains information on the form to be filed.
a. Form Types
This drop down list contains all possible EDGAR submission form types, sorted alphabetically. Choosing a form type will add all pertinent fields to the dialog and enable or disable buttons depending on which information is needed for the form type.
This area contains information that applies to the filer, including the contact information.
a. CIK (Central Index Key)
Unique number used to identify the filing entity. This number is public and can be found in the header information of all submissions. Use of the CIK differentiates between filing entities with similar names. A CIK is used to identify all filers, both EDGAR and non-EDGAR. Individuals should use their own CIK number and password each time they log on to EDGAR, even if their filings relate to different registrants. Enter the Filer Central Index Key (CIK) into this box. This key should be 10 characters long and is supplied by the SEC.
b. CCC (CIK Confirmation Code)
The CCC is a code of eight characters having at least one number (0-9) and at least one special character (@, #, $, *). The CCC is case-sensitive and you must enter it exactly as created. Enter the Filer CIK Confirmation Code (CCC) into this box.
c. Contact
Enter the name of the person to contact if the SEC has any questions or concerns with the filings.
d. Phone No.
Enter the phone number, including the area code, of the contact.
e. Co-Registrants
This button opens the Co-Registrants dialog, from which co-registrants may be added to the submission. This button will not be available on all form types, as some forms do not support co-registrants. When the button is clicked, the following menu appears:
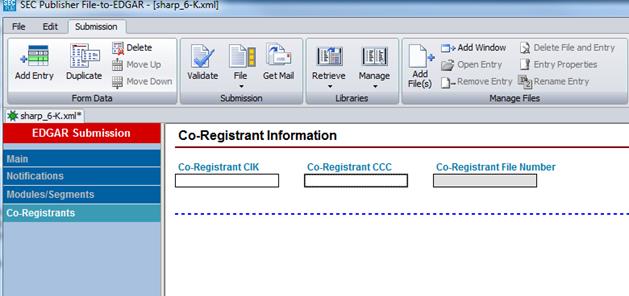
This area lists any Co-Registrants and their pertinent information that has been associated with the submission. Clicking on an item in the list will select it.
i. CIK
Enter the CIK of the Co-Registrant.
ii. CCC
Enter the CCC of the Co-Registrant.
iii. File Number
Enter the file number of the Co-Registrant’s filing, if applicable.
iv. Add Entry
Clicking this button adds a new entry to the list. The entry will contain the information that was entered into each of the fields. When all the values have been entered into the applicable fields, click the Add button to add the Co-Registrant data to the list.
v. Duplicate
Clicking this button adds a duplicate entry of the previously entered Co-Registrant CIK and Co-Registrant CCC number.
vi. Move Up
Click this button to move the selected entry up one position in the list. If the selection is at the top of the list, this button will not be available. The order of the Co-Registrants should make no difference to the submission.
vii. Move Down
Click this button to move the selected entry down one position in the list. If the selection is at the bottom of the list, this button will not be available. The order of the Co-Registrants should make no difference to the submission.
viii. Delete
Click this button to remove the selected entry from the list.
f. Library
This button opens the File-to-SEC Library. This library contains a list of Filer CIK, CCC, contact, SROS, and phone number information. It is password protected and encrypted. Choosing an entry in the File-to-SEC Library and clicking OK will automatically populate the fields in the Filer area. For more information on using the library, see The Library.
Checking this box will request a return copy of the EDGAR filing from the SEC. This copy serves as a means of ensuring the filing was received by the SEC. The Return Copy of the filing must be retrieved from the SEC’s EDGAR Filing website.
This option will inform the SEC if the official filing to the SEC was previously made on paper. Checking this option will make the File Number field become an available and required field.
This field contains a list of Self-Regulatory Organizations. Choose the option(s) on which the issuer’s securities are traded or listed by clicking on the name of the SRO. Clicking on each item will add it to the selection. Clicking on a highlighted item will remove it from the selection. Choose NONE if none of the options apply.
This option should be checked if the official filing to the SEC was previously made on paper. If the File Number field is present and not available on the form, it will become available and will be required.
Enter the SEC-supplied file number into this field. File numbers may contain up to 17 characters.
Note: When ‘Confirming Paper Copy’ is selected on a filing that contains Subject Company information, the ‘File Number’ field will available in the Subject Company area.
Enter the date of the report or the last day of the period for the filing into this field. This field may also be used for proxy meeting dates.
This field specifies the act(s) under which certain filings from investment companies may be filed. Choose an option from the drop down list. Option 33 40 is reserved for filings that can be filed under both acts.
Check this option if the submission contains a delaying amendment.
This button will appear for those filings that have references to the 1933 Act Registration Statements updated pursuant to Rule 429. Clicking on the button will make the following dialog appear:
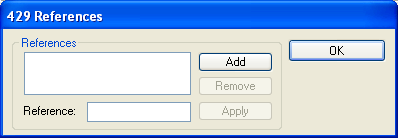
The text area contains a list of values that have been entered. Values in the list represent the file number(s) of prior registration statements.
a. Reference
Enter the file number into this field.
b. Add
Clicking the Add button will add the file number in the Reference field to the list.
c. Remove
Clicking the Remove button will remove the highlighted file number from the list.
d. Apply
If an item is highlighted and its value is edited in the Reference area, clicking the Apply button will apply the changes to the item in the list. Values will not be updated unless the Apply button is pressed.
Enter the 1933 Act file number associated with the prior effective registration statement pursuant to Securities Act Rule 462(b).
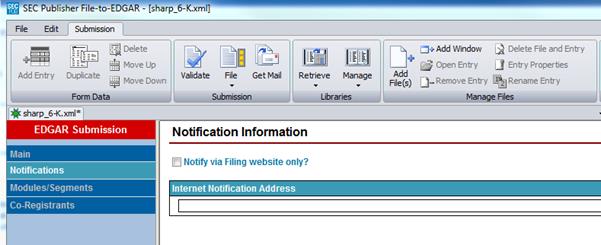
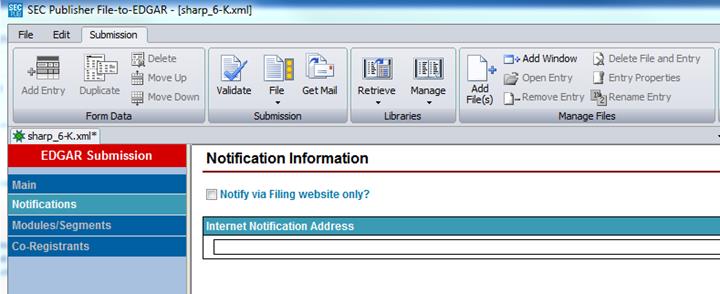
The ‘Notifications Page’ is used to set email addresses of people who are to receive emails regarding the status of a test filing or a live filing. To add Notifications to the submission, use the following method:
The following menu will appear:
This menu contains the following options:
This area displays any e-mail addresses to which submission notifications will be sent.
This area contains information about each e-mail entry.
a. E-mail
Type the e-mail address of the intended recipient into this field.
Check this box to be notified using the filing website only. No notification e-mails will be sent to the filer.
When all the e-mail notification information has been set, click a button in the Left Navigation Bar or a Tab to continue creating the submission.
To add modules or segments to the submission, use the following method:
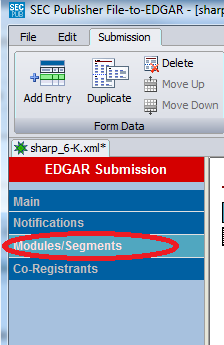
The following page will appear:
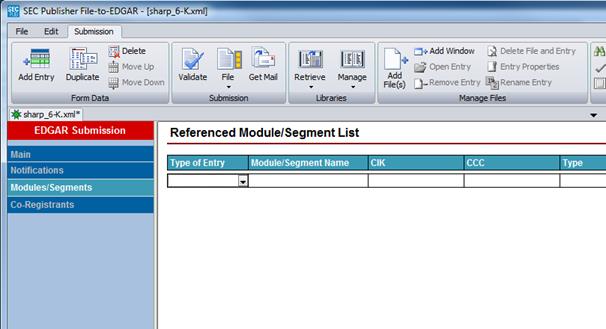
This page contains a list of any modules and/or segments that have been attached to the submission. The following fields are present in this page:
This column displays whether the attachment is a module (M) or a segment (S).
This column displays the name of the module or segment.
This column contains the type of the module or segment.
This column displays the CIK associated with the module. This column should contain no data if the item is a segment.
This area contains the information pertinent to each module or segment. Certain fields may be unavailable, depending on whether the item is a module or a segment.
a. Name
Enter the name of the module or segment.
b. CIK
Enter the CIK associated with the module. This field only becomes available when the ‘Is Module’ field is checked.
c. CCC
Enter the CCC associated with the module. This field only becomes available when the ‘Is Module’ field is checked.
d. Type
Write in what type of Module/Segment you are working with.
When all the modules and/or segments have been added to the submission, click on a button on the Left Navigation Bar or a Tab to continue creating the submission.
To add fee and offering data to the submission, use the following method:
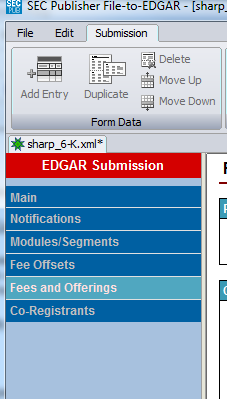
This page will be available only for those submission types that accept fee and offering information. Depending on the chosen form type, there are different versions of the ‘Fees/Offerings Information’ page.
The first possible Fees/Offerings Information page:
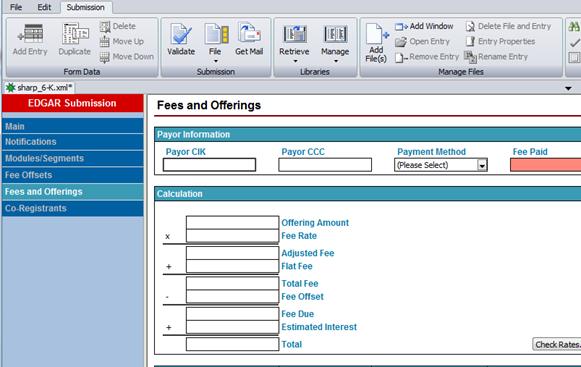
This area contains information pertaining to the payor of the fees.
a. CIK
Enter the payor CIK.
b. CCC
Enter the CCC of the payor.
c. Payment Method
Choose a payment method from the drop down list.
d. Fee Paid
Enter the fee paid or use the ‘Calculate’ button to calculate the fee paid.
e. Calculation
There is a ‘Check Rates’ button that will download the Rate Table from the SEC’s website. When the fee rate table is accessible, the following dialog box will appear:
f. Interest
This area contains information applicable to late filings. This data will be used to calculate interest for the fee due.
i. Filing is late (more than 90 calendar days)
Check this box if the filing is late. Doing so will activate the ‘Days Late’ field.
g. Fee
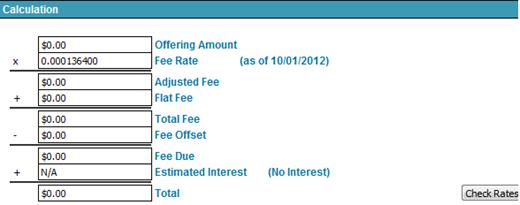
This area shows the calculation for the fee. The fields in this menu cannot be edited from within this dialog, though some are taken from user-entered information on the Fees/Offerings and Fee Offset Information pages.
i. Amount
This field contains the flat amount for the fee. This data is taken from the Fees/Offerings Information page.
ii. Fee Rate
This field contains the SEC fee rate, which is taken from the SEC’s fee rate table. The date indicates the day the fee rate was adopted.
iii. Adjusted Fee
This field displays the adjusted fee, calculated from the amount and the fee rate.
iv. Flat Fee
This field will display the flat fee, if applicable.
v. Total Fee
This field contains the total fee, calculated from the flat fee and the adjusted fee.
vi. Fee Offset
This field displays the fee offset, which is taken from the Fee Offset Information page.
vii. Fee Due
This field displays the fee due, calculated prior to any interest that may be applied due to a late filing.
viii. Est. Interest
This field will display the estimated interest due at the rate taken from the SEC’s fee rate table, if applicable.
ix. Total
This field contains the total fee due. This is the value that will be inserted into the Fee Paid field on the Fees/Offerings Information page when the OK button is pressed.
This column displays the series/class ID of the share.
This column displays the sales-proceeds information pertaining to the share.
This column displays the redeemed value of the share.
Press this button to move the selected share up one position in the list. If the share is at the top of the list, this button will be unavailable.
Press this button to move the selected share down one position in the list. If the share is at the bottom of the list, this button will be unavailable.
Press this button to remove the selected share from the list.
This area contains information pertaining to each share entry.
a. Series/Class ID
Enter the series/class ID of the share.
b. Sales-Proceeds
Enter the sales-proceeds information pertaining to the share.
c. Redeemed Value
Enter the redeemed value of the share.
d. Add
Click this button to add the entry to the list.
e. Apply
If any changes were made to the information of the selected Fee/Offering entry, press this button to apply the changes. You must press Apply for changes to be retained. Clicking on another share or changing the page will discard the changes.
Note: If any data was altered in the Shares Information area and the changes were applied to the data, the Fee Paid should be recalculated. The Fee Paid will only update when you open the Calculate Fee Due dialog and click the OK button. The new fee will then be entered into the Fee Paid field.
When all the fee and offerings information have been added, click on a button on the Left Navigation Bar or a Tab to continue creating the submission.
The second possible Fees/Offerings Information page:
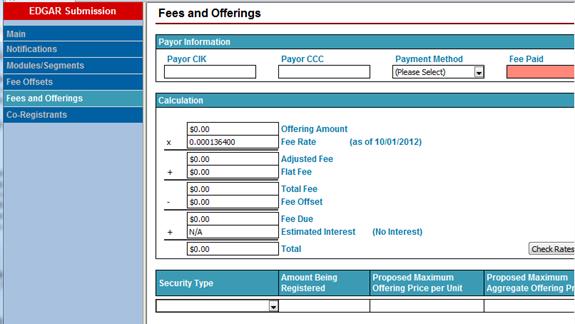
This area contains information pertaining to the payor of the fees.
a. CIK
Enter the payor CIK.
b. CCC
Enter the CCC of the payor.
c. Payment Method
Choose a payment method from the drop down list.
d. Fee Paid
Enter the fee paid or use the Calculate button to calculate the fee paid.
e. Calculate
Pressing the Calculate button will open the Calculate Fee Due dialog, if the fee rate table has been downloaded from the SEC’s website. For more information on how to download the fee rate table, see Update Fee Rate Table. The Calculate Fee Due dialog is described earlier in the chapter and functions exactly the same for each Fees/Offerings Information page.
This column displays the maximum number of units being offered for the proposed registration fee.
This column displays the price per unit of the security being offered for the proposed registration fee.
This column displays the aggregate price of the units for the proposed registration fee.
This column displays the security type of the proposed registration fee.
Click this button to move the selected entry up one position in the list. If the entry is at the top of the list, this button will be unavailable.
Click this button to move the selected entry down one position in the list. If the entry is at the bottom of the list, this button will be unavailable.
Press this button to remove the selected entry from the list.
This area contains information pertaining to the proposed registration fee.
a. Security Type
Choose the security type from the drop down list.
b. Max. Amt. Offered
Enter the maximum number of units being offered into this field.
c. Max. Price per Unit
Enter the maximum price per unit into this field. Numbers will be converted into a proper dollar-cent format automatically.
d. Max. Aggregate Price
Enter the maximum aggregate price. Numbers will be converted into a proper dollar-cent format automatically.
e. Add
Click this button to add the entry to the list.
f. Apply
If any changes were made to existing fee information, press this button to apply the changes. You must press Apply for changes to be retained. Clicking on another fee or changing the page will discard the changes.
Note: If any data was altered in the Proposed Registration Fee area and the changes were applied to the data, the Fee Paid should be recalculated. The Fee Paid will only update when you open the Calculate Fee Due dialog and click the OK button. The new fee will then be entered into the Fee Paid field.
When all the fee information has been added, click on a button on the Left Navigation Bar or a Tab to continue creating the submission.
The third possible Fees/Offerings Information page:

This area contains information pertaining to the payor of the fees.
a. CIK
Enter the payor CIK.
b. CCC
Enter the CCC of the payor.
c. Payment Method
Choose a payment method from the drop down list.
d. Fee Paid
Enter the fee paid or use the Calculate button to calculate the fee paid.
e. Calculate
Pressing the Calculate button will open the Calculate Fee Due dialog, if the fee rate table has been downloaded from the SEC’s website (see ‘Update Fee Rate Table’ for more information on how to download the fee rate table). The Calculate Fee Due dialog is described earlier in the chapter and functions exactly the same for each Fees/Offerings Information page.
This column displays the maximum amount of units for the proposed registration fee.
This column displays the price per unit of the security being offered for the proposed registration fee.
This column displays the aggregate price of the units being offered for the proposed registration fee.
This column displays the security type of the proposed registration fee.
Click this button to move the selected entry up one position in the list. If the entry is at the top of the list, this button will be unavailable.
Click this button to move the selected entry down one position in the list. If the entry is at the bottom of the list, this button will be unavailable.
Press this button to remove the selected entry from the list.
This area contains information pertaining to the proposed registration fee.
a. Type of Payment
Choose the type of payment from the drop down list.
b. Security Type
Choose the security type from the drop down list.
c. Max. Amt. Offered
Enter the maximum number of units offered into this field.
d. Max. Price per Unit
Enter the maximum price per unit into this field. Numbers will be converted into a proper dollar-cent format automatically.
e. Max. Aggregate Price
Enter the maximum aggregate price. Numbers will be converted into a proper dollar-cent format automatically.
f. Add
Click this button to add the entry to the list.
g. Apply
If any changes were made to the information of an existing fee, press this button to apply the changes. You must press Apply for changes to be retained. Clicking on another fee or changing the page before clicking Apply will discard the changes.
Note: If any data was altered in the Proposed Registration Fee area and the changes were applied to the data, the Fee Paid should be recalculated. The Fee Paid will only update when you open the Calculate Fee Due dialog and click the OK button. The new fee will then be entered into the Fee Paid field.
When all the fee information has been added, click on a button on the Left Navigation Bar or a Tab to continue creating the submission.
To add fee offset information for the submission, use the following method to bring up the page:
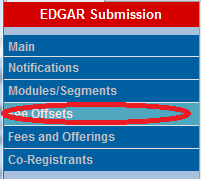
The following page will appear:
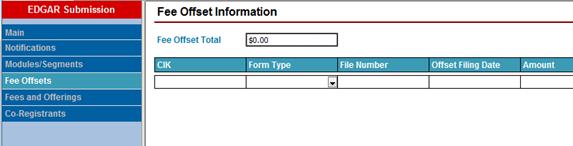
This column displays the CIK associated with the fee offset filing.
This column displays the form type of the fee offset filing.
This column displays the file number of the fee offset filing.
This column displays the amount of the fee offset.
Click this button to move the selected entry up one position in the list. If the entry is at the top of the list, this button will be unavailable.
Click this button to move the selected entry down one position in the list. If the entry is at the bottom of the list, this button will be unavailable.
This area contains information pertaining to each fee offset.
a. Fee Offset Total
The total offset fee that is calculated is entered here.
b. CIK
Enter the CIK associated with the filing for the fee offset.
c. Form Type
Choose the form type of the fee offset filing from the drop down list.
d. File Number
Enter the file number of the filing associated with the fee offset.
e. Offset Filing Date
Enter filing date of the filing associated with the fee offset.
f. Amount
Enter the amount of the fee offset. Numbers will be converted into a proper dollar-cent format automatically.
When all the fee offset information have been added, click on a button on the Left Navigation Bar or a Tab to continue creating the submission.
Related Topics
©1999-2022 BCL Technologies. All Rights Reserved. Unauthorized duplication or distribution prohibited.
| Converted from CHM to HTML with chm2web Standard 2.85 (unicode) |