


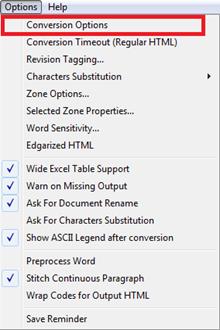
Click Conversion Options from the following menu or toolbar, or use the keyboard shortcut to access all EDGAR HTML Conversion Options:
Options > Conversion Options
![]()
Shift+F7
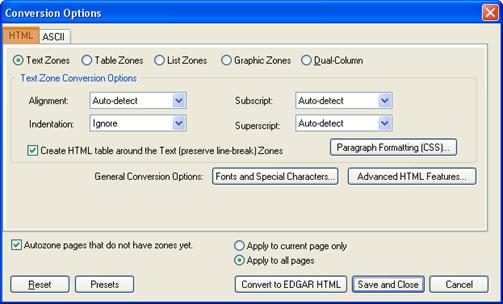
The following dialog box will appear:
Click the Table Zone radio button to access Table Zone Conversion Options.

This option allows you to set the Table options for EDGAR HTML output.
Note: All the Table options that you select here will be applied to all the corresponding table zones within the document.
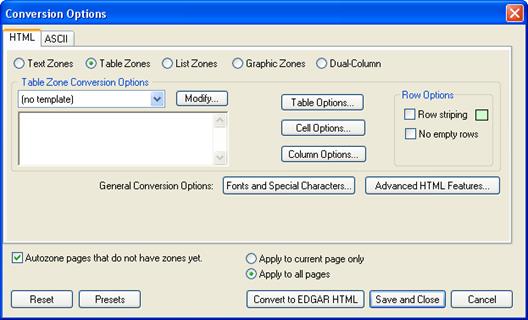
You can set a template that can be applied to some/all tables in their EDGAR HTML output. Click the drop down box and select a template to apply the template to the table(s) in the EDGAR HTML document. For example, selecting the template shown below will produce tables with center alignment and green striping.

To add, delete, or modify a template, simply click the ‘Modify’ button. The following dialog box will appear:
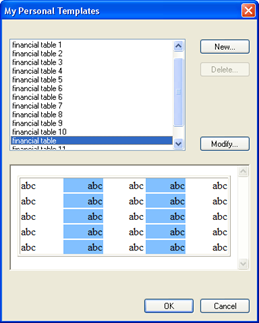
Select this button to create a new template. The following dialog box will appear:
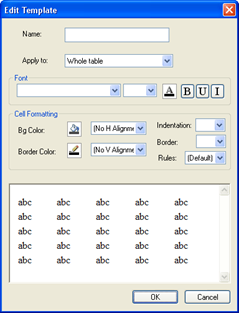
a. Name
You can name the template in the name column of this window.
b. Apply to
From the Apply todrop down menu, you can assign whether the selections you choose apply to:
i. Whole table
ii. Header Row
iii. Last Row
iv. Left Column
v. Right Column
vi. Odd Rows
vii. Even Rows
viii. Odd Columns
ix. Even Columns
c. Font
Specify the font name, font size, font color, and font style (bold, underline or italic).
d. Cell Formatting
Specify the background color, border color, horizontal alignment, vertical alignment, indentation, border width, and rules.
e. Preview box
Show the current format that you specified.
f. Press ‘OK’ to continue or ‘Cancel’ if you do not want to add a template.
Select a user-defined template and click ‘Delete…’ to remove it.
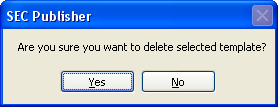
Click ‘Yes’ to continue or ‘No’ if you do not want to delete the template.
Select an entry and press ‘Modify’ button to modify a template. The following dialog box will appear:
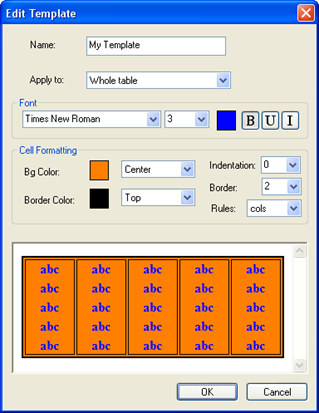
a. Name
You can name the template in the name column of this window.
b. Apply to
From the Apply to drop-down menu, you can assign whether the specifications you choose apply to:
i. Whole table
ii. Header Row
iii. Last Row
iv. Left Column
v. Right Column
vi. Odd Rows
vii. Even Rows
viii. Odd Columns
ix. Even Columns
c. Font
Specify font name, size, color, and style (bold, underline or italic).
d. Cell Formatting
Specify background color, border color, horizontal alignment, vertical alignment, indentation, border width, and rules.
e. Preview box
Show the current format that you specified.
f. Press ‘OK’ to continue or ‘Cancel’ to abort.
Click Table Options and the following dialog box will appear:
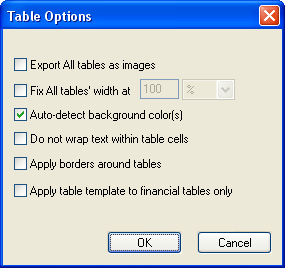
This option converts all Tables into JPEG images in the HTML output.
Tip: When this option is used, all other table options are no longer applicable. The applicable options for images are listed under the ‘Graphic Zone Conversion Options’.
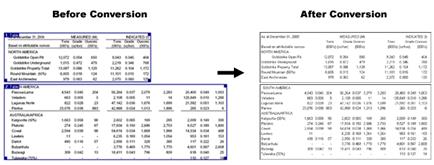
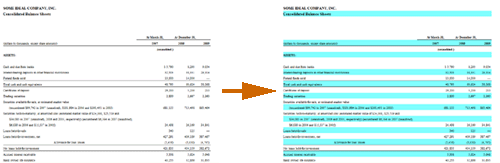
This option will force all Tables to have the same width in the HTML output (see illustration below):
This option will auto-detect the table background color from the original document for the HTML output.
Selecting this option will prevent the text inside the cells from wrapping to the next line.
Selecting this option will put a border around the table.
Selecting this option will only apply the selected table template to tables that have numbers in them, like financial tables.
Click Cell Options and the following dialog box will appear:
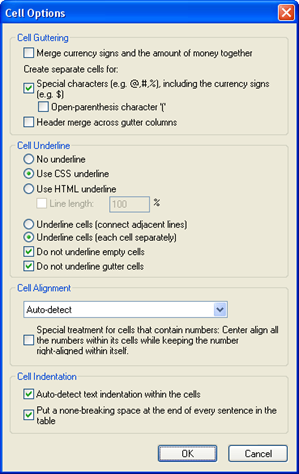
This option is used to put the currency sign in the same cell as the amount of money.
This option should be selected if you want to put the currency sign and ‘)’ in their own columns.
If this option is selected, then open-parenthesis character will be considered to be a gutter element and will be pulled in to a separate column.
If this option is selected, then the header will be merged across the columns created for currency signs and ‘)’ characters.
If selected, this option will not allow any cells to be underlined.
Choose this option to use CSS to create the underline. This option allows for a more accurate and tight underlining between cells.
Choose this option to use HTML to create the underline. There is additional option to select the length of the HTML underline as percentage of the width of the cell.
Choose this option to connect the underlines between cells.
Choose this option to underline each cell separately.
If selected, this option will not underline empty cells.
If selected, this option will not underline gutter cells.
This option preserves the Cell Alignment of the original document.
This option will force the text inside all cells to the Left-aligned.
This option will force the text inside all cells to the Right-aligned.
This option will force the text inside all cells to the Center-aligned.
This option ensures that the alignment of the cells will be either left or right, based on the formatting of the original file. This will also ensure that the alignment will not be centered.
Select this option if you do not want to put Cell Alignment information in the HTML Code.
This option will right-center align the number columns. This means that the numbers are going to be right- aligned, but the whole number column will be centered within the column.
Choose this option to preserve the cell indentation from the original document.
This option will automatically detect the text indentation within the cells.
This option will put an extra space after the text in the table
Column Options
Click Column Options to make the following dialog box appear:
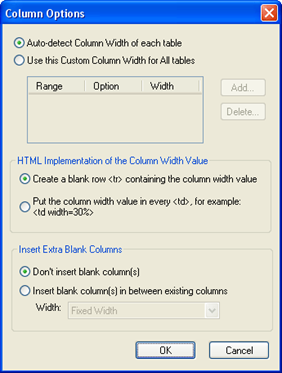
Choose this option if you want to preserve the Column Width from the original document.
Choose this option if you want to apply your own set of Column Width Rules. It automatically applies specific column width value to the tables that fits the rule(s). Each rule will be displayed as:
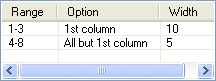
If a table has 1, 2, or 3 columns, apply a column width of 10% to the 1st column.
If a table has 4,5,6,7 or 8 number of columns, apply a column width of 5% to each column, starting from the 2nd column.
This section controls where the Column Width of the columns of the table will be stored.
When selected, this option will create an extra row at the top of the table, which contains the width of the column.
When selected, this option will put the column width in each cell of the table.
This section controls if blank columns will be inserted between the columns of the table.
Choose this option if you do not want to insert extra blank column(s) between existing columns.
Extra blank column(s) will be automatically inserted in between existing columns. This is primarily used for creating separation between columns of numbers if the table is densely populated.
This option will automatically apply background color of your choice to every other row in all tables.

This option will automatically remove empty rows from all tables.
Related Topics
©1999-2022 BCL Technologies. All Rights Reserved. Unauthorized duplication or distribution prohibited.
| Converted from CHM to HTML with chm2web Standard 2.85 (unicode) |