


Click Fonts and Special Characters… from the toolbar or keyboard shortcut:
o Toolbar Menu:
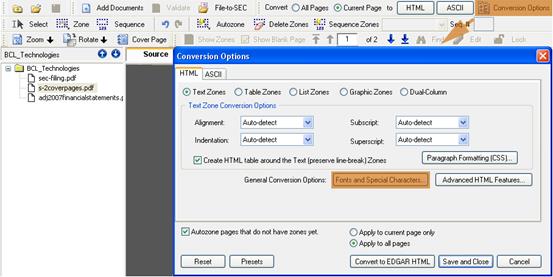
The following dialog box will appear:
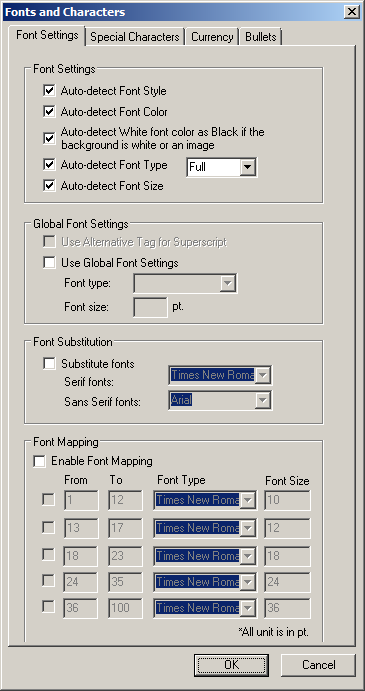
These options apply to all text inside all the Zones in the document:
This option allows you to embed source font types and sizes in the HTML output.
By default, when superscripts are converted to HTML, the <SUP> tag is used. When this option is selected, the Font Size and Vertical Alignment will be adjusted to create the superscript instead of using the <SUP> tag. Available when the ‘HTML (Optimized for MS Word)’ option is selected.
This option allows you to use a single font type and/or size throughout the document no matter what the source font type or size was.
This option allows you to substitute Serif and Sans Serif fonts to the font type of your choice.
This option allows you to set a standardized font size and type for text within a specific size range. To change the font size while retaining the original font type, select ‘(Use Existing Font)’ from the ‘Font Type’ drop-down.
These options apply to all text inside all the Zones in the document:
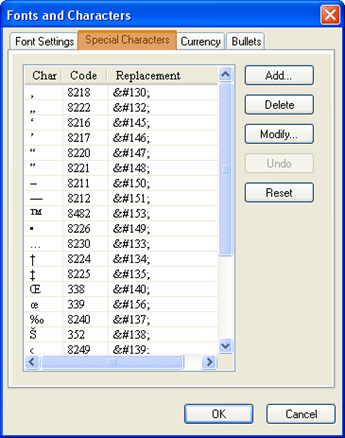
This window shows you a list of characters (Char) and Codes from their original documents along with their HTML code representation. When converting a special character to an HTML document, the Char is what you see when viewing an HTML document, while the replacement is how it is seen when viewing the HTML code.
This allows you to add an additional character and specify the replacement HTML symbol to use. There are two ways of identifying the code:
o If you know the character code, you can directly enter it.

o Copy and paste the character directly from Word or Excel file, then enter the replacement HTML code you would like to use.
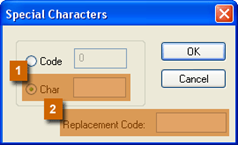
Press ‘OK’ to continue or ‘Cancel’ if you do not wish to add additional characters.
You can delete an entry from the Special Characters replacement table by selecting the entry and pressing ‘Delete’.
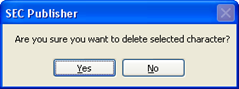
Press ‘Yes’ to continue, or ‘No’ if you do not wish to delete an existing entry.
You can modify an entry from the Special Characters replacement table by selecting the entry and pressing ‘Modify’.
Modify the existing entry and press ‘OK’ to continue or ‘Cancel’ if you do not wish to modify an existing entry.
This undoes any change made in the Special Characters replacement table, such as Deletion or Addition.
Tip: You can only undo one level of change.
This resets the replacement entries to the pre-set table supplied as part of the default SEC Publisher installation.
These options apply to all text inside all the Zones in the document:
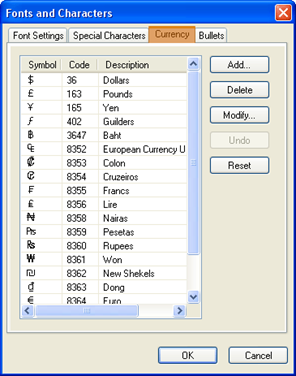
This window shows you a list of currency symbols and their representation in the HTML code.
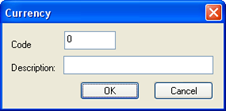
This button allows you to add a new entry into the Currency table. When pressed, the following menu appears:
i.
Code
This field is for entering the code of the currency character to be
added.
ii.
Description
This field is for entering an English description of the currency
sign that is to be added.
iii.
OK
Click this button to add the entered information into the currency
symbol list.
iv.
Cancel
Click this button to return to the Currency sign menu.
You can delete an entry from the Currency table by selecting the entry and pressing ‘Delete’. When ‘Delete’ is pressed, the following menu appears:

Click ‘Yes’ to delete the selected entry, and press ‘No’ to cancel the deletion process.
You can modify an existing entry in the table by selecting the entry and pressing ‘Modify’. When pressed, the following menu appears:
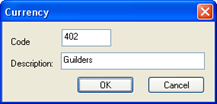
i. Code
This field is for entering the code of the currency character to be added.
ii. Description
This field is for entering an English description of the currency sign that is to be added.
iii. OK
Click this button to add the entered information into the currency symbol list.
iv. Cancel
Click this button to return to the Currency sign menu.
This undoes any change in the Currency table, such as Deletion or Addition.
Tip: You can only undo one level of change.
This resets the replacement entries to the pre-set table supplied as part of the default SEC Publisher installation.
These options apply to all text inside all the zones in the document:
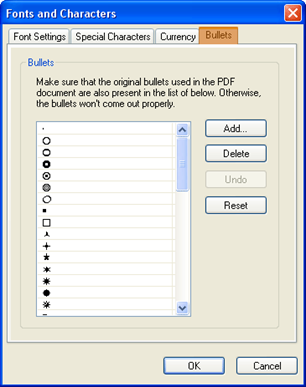
This window shows you a list of bullet signs that SEC Publisher will recognize when converting document(s) to EDGAR HTML or EDGAR ASCII.
You can add bullet signs by pressing this button. Pressing this button will bring up the following menu:
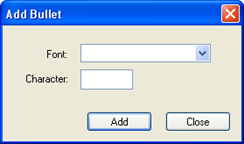
i. Font
You can select the bullet’s font type by opening up the drop down and selecting the font type of the bullet character in the original document.
ii. Character
Enter the bullet character into this field.
iii. Add
Press this button to add the bullet to the list.
iv. Close
Press this button to return to the list and not add a bullet to the list.
You can delete an entry from the Bullets table by selecting the entry and pressing ‘Delete’. The following menu appears when ‘Delete’ is pressed.
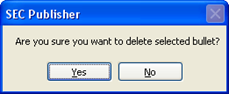
This undoes any change in the Bullets table, such as Deletion or Addition.
Tip: You can only undo one level of change.
This resets the replacement entries to the pre-set table supplied as part of the default SEC Publisher installation.
Click Advanced HTML Features… from the toolbar:
The following dialog box will appear:
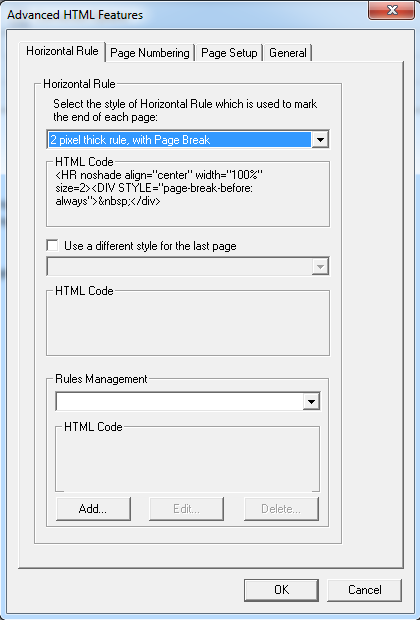
Choose different horizontal rules from the drop down menu. These rules will be repeated after every page. You can also define a horizontal rule by putting in the appropriate HTML code. For the last page, you have an option to use a different horizontal rule, which is also customizable.
This section contains options to select, edit, and view the HTML code of the horizontal rule.
This drop down contains a list of different types of horizontal rules. Open it and select one to apply it to a conversion of a document or page to EDGAR HTML.
This section shows the HTML code of the selection made in the ‘Horizontal Rule’ drop down.
You can select this option to put a different rule for the last page of the documents that are to be converted to EDGAR HTML. When selected, this option enables the ‘Last Page Horizontal Rule’ drop down.
This drop down shows the selection made for the horizontal rule of the last page of the document. Select an option for it to be applied when converting the last page of a document.
This field shows the HTML code of the selection made in the‘Last Page Horizontal Rule’ drop down.
Allows you to ‘Add’ a new Horizontal Rule. Once a new rule is added, you will also be able to ‘Edit’ or ‘Delete’ any new rules that have been added. ‘Edit’ and ‘Delete’ are not available for predefined rules.
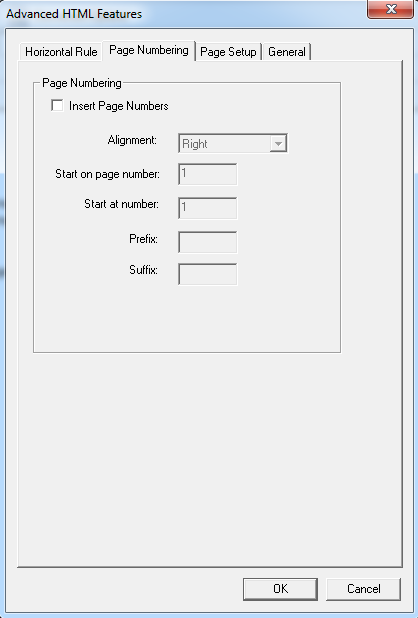
SEC Publisher allows you to put in page numbers in any way you like. Choose different alignment such as left, right or center; decide which page the page number should start from; decide the starting page number; a prefix; and a suffix to define the pagination style.
Warning: Please turn-off pagination in the source document before using this option.
Tip: If you cannot turn-off pagination in the original document, then please ensure that the page numbers is not zoned (you can see their zoning by switching to the Source Tab). The output in HTML would have duplicate page numbers otherwise.
SEC Publisher allows you to modify the page setup. You have the option to select different border color, thickness, style, page margins and text width. In addition, you can configure conversion options exclusively for ‘HTML Optimized for MS Word’.
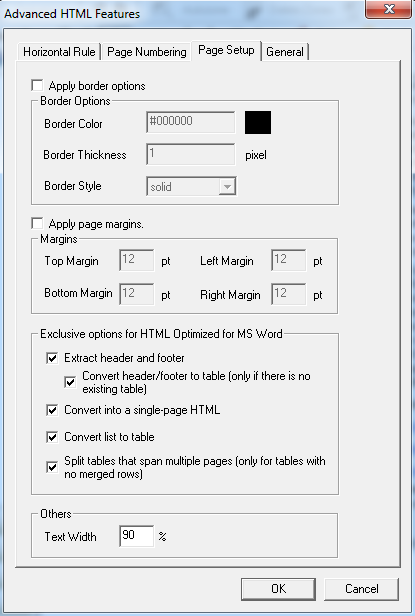
You can enclose each page with a border. Select Apply border options and pick the border color, thickness and style.
If you’d like to leave some space between the content of each page and the edges of the screen/page, select Apply page margins and then enter your desired spacing in point for all the 4 sides. Alternatively, if you wish to leave some space on the left and right sides only, you can specify the spacing as a percentage under Others below.
These options are only available when converting ‘HTML Optimized for MS Word’:
a. If you’d like SEC Publisher to automatically extract headers and footers, select the Extract header and footer option.
b. If the header/footer has no existing table, use the Convert header/footer to table add-on option to convert it into a table for easy alignment change.
c. To maximize ease-of-use with vertical scrolling, select the Convert into a single-page HTMLoption. This will convert the entire document into a single page so you can view adjacent pages and compare paragraph/list/table alignments.
d. To ensure lists are aligned properly, you can use the Convert list to table option to convert them into tables. SEC Publisher will preserve the list indentation in most cases. For other cases, you can easily change the alignment by dragging the markers on the ruler in the HTML Editor after conversion.
e. If you have a large table that spans multiple pages and would like to split this table according to the Word document, then use the Split tables that span multiple pagesoption. Please note that this option will only work if the table does not have any merged rows.
To introduce some space between the left and right edges of the screen/page, set the Text Width to be below 100%. For example, set the Text Width to be 90% to have a 5% gap on each side.
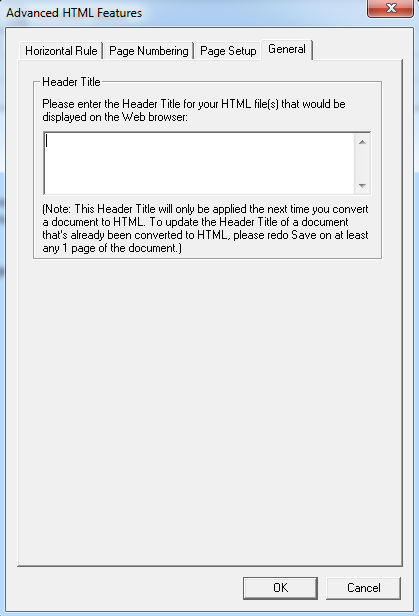
SEC Publisher allows you to modify the Header Title for the HTML file(s).
Related Topics
©1999-2022 BCL Technologies. All Rights Reserved. Unauthorized duplication or distribution prohibited.
| Converted from CHM to HTML with chm2web Standard 2.85 (unicode) |