


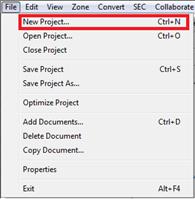
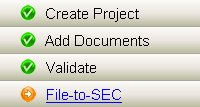
Click Create Project from the following menu or toolbar, or use the keyboard shortcut:
File > New Project
![]()
CTRL+N
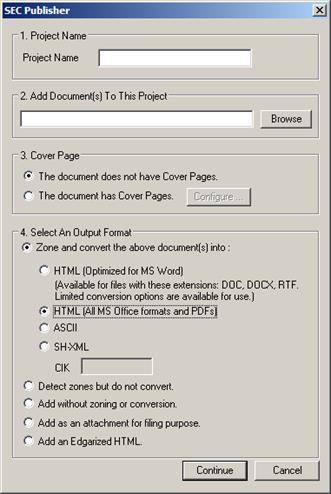
The following dialog box will appear:
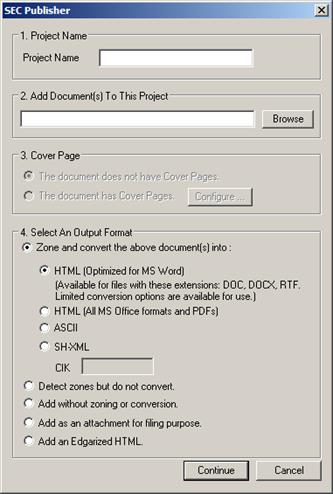
Choose a name for the project.
You are able to add as many documents as you want. Simply click-and-hold the CTRL key and click the file(s) to add them into the project.
Warning: You may login as either an admin or non-admin user. The first time a non-PDF document is added to SEC Publisher, the software will automatically run MS Office configuration. Please make sure to let the auto configuration be completed and refrain from trying to cancel or stop the process.
Warning: If you are going to process a Word document with embedded MS Excel Table in it, please make sure that MS Excel is closed or the conversion will not be successful.
Let SEC Publisher know if the document contains a cover page. For now, keep the default selection (no cover page).
SEC Publisher version 5.5 onwards provides two different options for HTML output format:
a. HTML Optimized for MS Word
(Please see section: “Convert an MS-Word Document to EDGAR HTML” below for more explanation).
b. Standard HTML conversion for other document types, including badly formatted MS Word files
(Please see section: “Convert Other Document Types to EDGAR HTML” below for more explanation).
Press the ‘Continue’ button to start the conversion option.
If the file name of a document in a Project does not meet the SEC naming conventions, SEC Publisher will automatically recommend an alternative filename.
SEC Publisher automatically detects unknown character(s) in the document during initial conversion and recommends replacement character(s). You will be able to access this functionality under Characters Substitution, a pop-up window.
SEC Publisher version 5.5 onwards allows you to add or import MS Word document directly as a HTML file. It allows ‘Optimized Word Import’ where you can import MS Word documents directly into SEC Publisher and touch up the document in the editor before validating and filing it.
Optimized Word Import has a number of benefits including:
Optimized Word Import Workflow
To use SEC Publisher’s ‘Optimized Word Import’ feature effectively, follow our suggested workflow given in the figure below.

Warning: If you are going to process a Word document with embedded MS Excel Table in it, please make sure that MS Excel is closed or the conversion will not be successful.
1. Authoring and Editing in MS Word
a. Authoring
Web vs. Page Layout
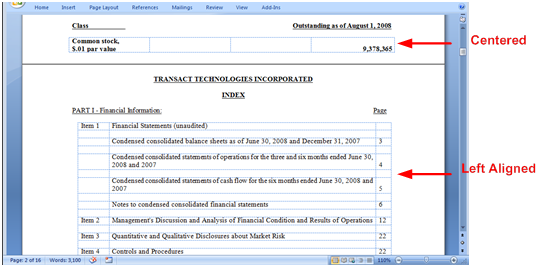
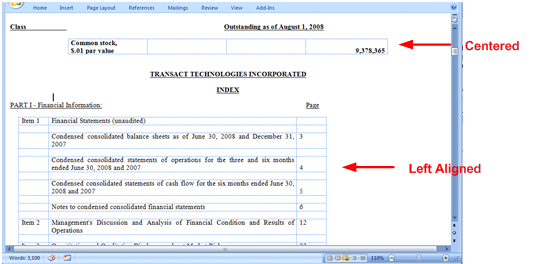
There is a key difference between normal Word authoring and authoring for the EDGAR filing, in that normal Word documents have margins, while EDGAR HTML documents do not have margins. In practical terms, this means that text, tables and images that look formatted with a certain alignment in normal Word documents might not have the same alignment when converted to HTML.
An example of this can be seen in the figure below. In a normal Word document, the two tables appear to be centered. However, when converted to HTML, one table is left-aligned and the other is center-aligned. This is apparent in the Web Layout View:
Left-Aligned table in “Print Layout” View (Normal View)
Left-Aligned Table in “Web Layout” View
b. Authoring in Web Layout
To make sure that your EDGAR HTML document looks like the document you are authoring, we recommend you use the Web Layout view at all times. This view will let you determine the format of your EDGAR Filing by visually inspecting it.
To do this, select the Web Layout View from the menu as shown in the figure below:
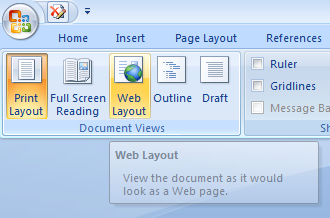
Web Layout view
Tip: Use Web Layout view when authoring and editing documents.
The second thing you need to be aware of is that EDGAR HTML has fewer fonts and different features when compared to Word. Some items that are created in Word do not have any equivalent counterparts in EDGAR HTML.

MS Word Options

EDGAR HTML Options
When SEC Publisher imports a Word document, it attempts to find an equivalent font in EDGAR HTML that is as close in shape and size to the Word font as possible. However, some Word fonts (e.g. Wingdings 1, 2, 3) do not exist in EDGAR HTML. SEC Publisher will substitute another font for it and the EDGAR HTML may not look like the original Word document.
Tip: Format the Word document according to the instructions in earlier sections to get the best EDGAR HTML output.
c. Formatting Other Author’s Documents
If you are not the author of the Word document (i.e. you have received it from another source), we recommend you view it in Web Layout as suggested above. From the Web Layout view, you can determine if the EDGAR HTML will preserve the look and the feel of the original document. If it does not, we recommend you save the document and format a copy in Web Layout to be imported into SEC Publisher.
Tip: Ask the creator of the word document to use Web Layout view. This will minimize your need to re-format the document.
d. Revision Tagging
SEC Publisher allows you to put revision tags automatically from red-lined Word documents. You must setup Track Changes with the following options in MS Word before adding this document into SEC Publisher (see ‘Track Changes/Red-lining Options’ for more details):
i. Open a blank document in MS Word. Close all other Word documents and MS Outlook prior to making the following changes.
ii. Configure MS Word for Revision Tagging with these Track Changes options:
|
Insertion: |
Underline |
|
Deletion: |
Strikethrough |
|
Use Balloons: |
Never |
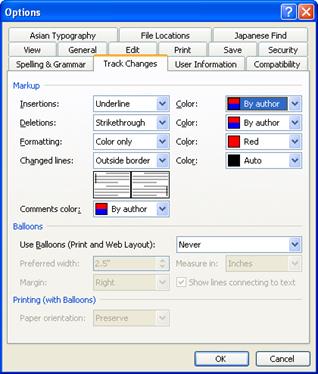
MS Word 2003 and earlier: MS Word Menu Bar > Tools > Options > Track Changes tab
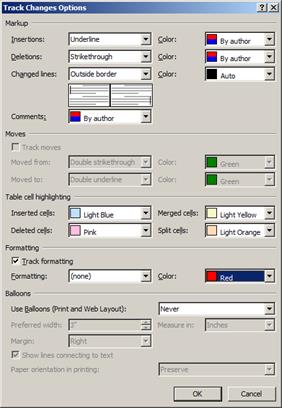
MS Word 2007 and later: MS Word Menu Bar > Review > Track Changes button > Change Tracking Options…
iii. Click ‘OK’ to close the Options box.
iv. Exit MS Word for the changes to be reflected correctly.
(See ‘Revision Tagging’ for more information.)
e. Paragraphs/Alignment/Margins
When formatting text in paragraphs, use Word’s built-in formatting functions. These can be accessed by right-clicking on the paragraph. A pop-up similar to the one below (depending on your version of Word) will give you the option for formatting the paragraphs.
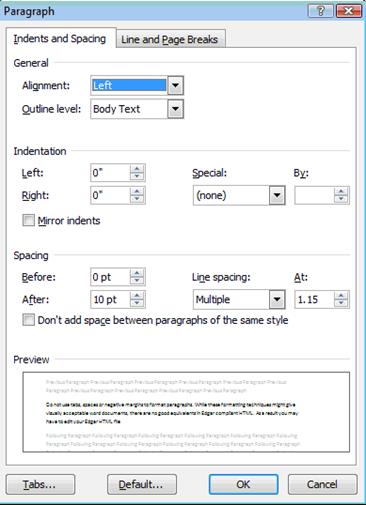
i. Do not use tabs, spaces or negative margins to format paragraphs. These formatting techniques might produce visually acceptable Word documents but there are no good equivalents in EDGAR compliant HTML. As a result, you may have to edit your EDGAR HTML file extensively to make it look visually acceptable.
ii. Exit MS Word for the changes to be reflected correctly.
2. Import Copy of document into SEC Publisher
a. Single Step Adding
Once the format of the Word document is acceptable in Web Layout, it can be imported through a single step by adding the document to the project using the HTML (Optimized for MS Word) option. Please use our enhanced features exclusively for HTML Optimized for MS Word to automatically extract headers and footers, convert as a single page for easy vertical scrolling and much more. (See ‘Page Setup’ under ‘Advanced HTML Features’ for more details.)
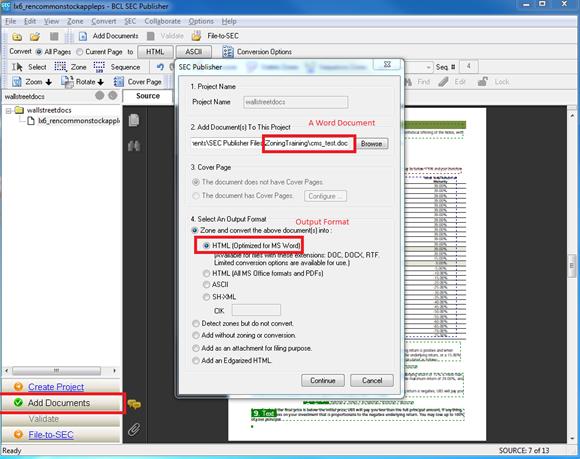
Importing Word Documents using the HTML (Optimized for MS Word) Option
3. Viewing, Modification and Final Touch-up in SEC Publisher
a. Viewing
Once you have added your document into SEC Publisher, visually inspect it to make sure it is formatted in the way you wish to file. Unlike adding a document through the PDF method, there is no “Source View”. You should open a copy of the document in Word to compare the EDGAR HTML and the imported Word document.
Tip: Edit your document in Word as much as possible. Then import or copy and paste the document into SEC Publisher.
b. Modification in MS Word
We strongly recommend you use Word to edit your document, whenever possible. This will maintain the integrity of your source Word document for later use and let you access all the power of Word’s editing capabilities.
If you have not modified the EDGAR HTML and the modifications are substantial (e.g. more than one page), we recommend you delete the document you previously added, save the modifications in Word and add it in again. This will import all the changes you made in the Word document.
If you have made a small number of changes (e.g. one page only) or have made modifications to the EDGAR HTML in SEC Publisher, we recommend you copy the changes from the Word document to the corresponding locations in SEC Publisher. Read on to learn how to copy-and-paste into SEC Publisher.
c. SEC Compliant HTML Editor
SEC Publisher comes with a SEC Compliant HTML Editor. It allows you to make changes directly on the HTML document. The HTML Editor is created fairly similar to any other regular text editor, such as MS Word, WordPad, etc. with additional functionality related to editing SEC EDGAR Compliant HTML. To open the HTML Editor, click on the Edit button or select Edit > HTML from the menu.
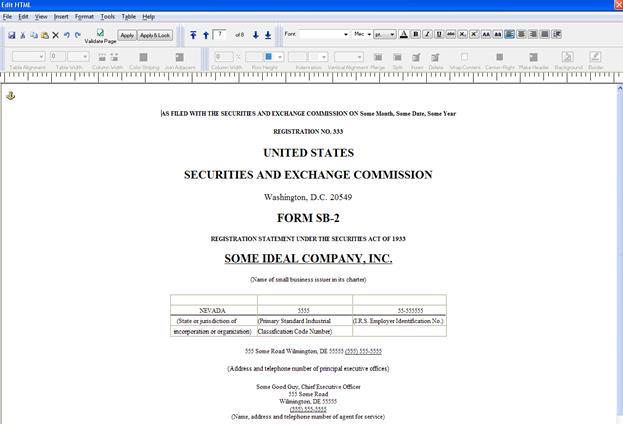
HTML Editor View
For details on how to edit your HTML document, please refer to section 5: Editing Your Output Document.
d. Copying and Pasting
From version 5.5 onwards, SEC Publisher allows you to Copy a selection of an MS Word document and then Paste that selection in SEC Publisher. As you copy-and-paste text from other documents, SEC Publisher automatically EDGARizes the content to ensure 100% SEC compliancy.
Tip: Content is automatically EDGARized when ‘copying and pasting’ from other document into the HTML Editor.
i. Open the document that you want to edit in SEC Publisher and go to the HTML Editor.
ii. Select the content that you want to copy from in MS Word and click Copy.
iii. Go back to the HTML Editor and move your cursor to the location where you want to paste your selection.
iv. Click on the Paste icon or select Edit > Paste from the HTML Editor menu.
4. Validating and Filing to the SEC EDGAR Database
After you are satisfied with the final document, you can validate and file it in the standard manner (see Section 6 for details on validating and filing).
To convert other document types to EDGAR HTML, first you will need to Create Project. Then, follow the steps below:
Choose a name for the project.
You are able to add as many documents as you want. Simply click-and-hold the CTRL key and click the file(s) to add them into the project.
Warning: You may login as either an admin or non-admin user. The first time a non-PDF document is added to SEC Publisher, the software will automatically run MS Office configuration. Please make sure to let the auto configuration finish and refrain from trying to cancel or stop the process.
Let SEC Publisher know if the document contains cover page. For now, keep the default selection (no cover page).
For document types other than MS Word, you can select either HTML or ASCII.
Press ‘Continue’ button to start the conversion.
If the file name of the document that you include in a Project does not meet the SEC naming conventions, SEC Publisher will automatically recommend an alternative filename.
SEC Publisher automatically detects unknown character(s) in the document during initial conversion and recommends replacement character(s). You will be able to access this functionality under ‘Characters Substitution’, a pop-up window.
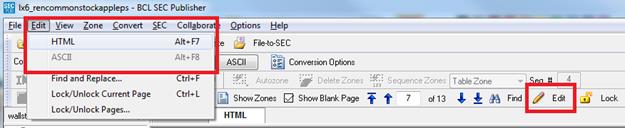
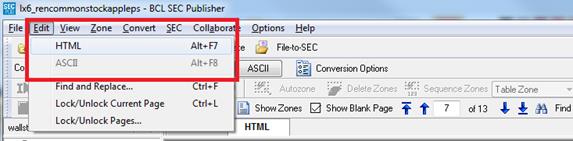
Once the HTML output for the document(s) is created, you can make direct modification to a file. To do so, click Edit from the following menu or toolbar, or use the keyboard shortcut:
Edit > HTML
![]()
ALT+F7
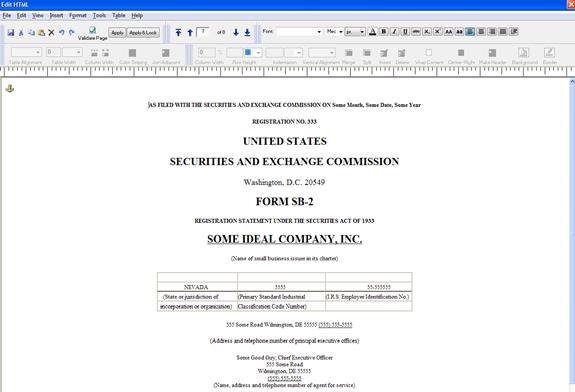
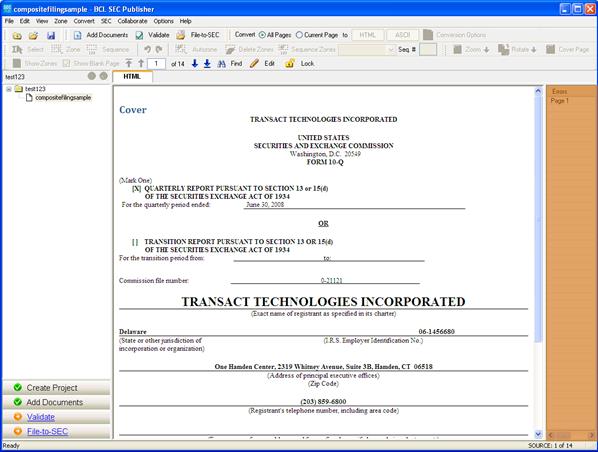
The following screen appears:
![]()
You will be able to do the following:
![]()
You will be able to go to the following pages of the document:
![]()
You will be able to modify the text formatting based on:
![]()
You will be able to modify the table formatting in the following ways:
![]()
You will be able to modify the cell formatting in the following ways:
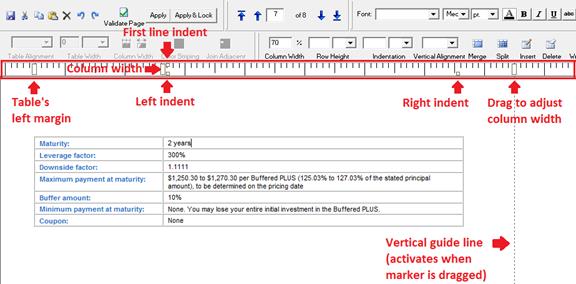
You can adjust indentations, column widths and table margin by dragging the markers on this ruler. A vertical guide line is activated when a marker is dragged so that you can easily check the alignment visually.
File > Apply and Lock, or
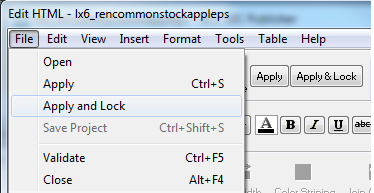

Locking the page makes sure that the changes to this particular page are locked. If you decide to re-convert the whole document with a new set of Conversion Options, the locked pages will not be touched.
Tip: When you click on Apply and Lock, only the current page is auto-validated.
Once the HTML output for a document is created, you can view that document’s EDGAR HTML output in the browser to see how it will look when submitted to the SEC. To do so, click View in Browser… from the View drop down menu:
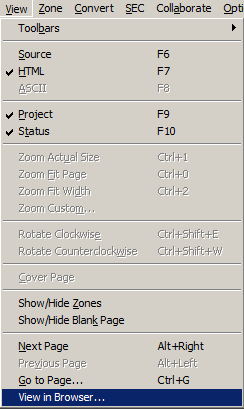
Tip: The View in Browser menu option will only be available when the HTML output of a document is selected. Only the EDGAR HTML output for the currently selected document will be displayed (see ‘Proof to Browser’ under ‘File-to-SEC’ for more details).
You need to validate the document to make sure that it meets SEC requirements 100%. If SEC Publisher finds errors, you will be prompted to fix them.
SEC > Validate
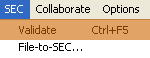
This will validate the whole document.
File > Validate
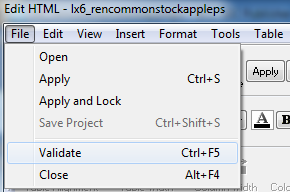
This will validate the current page in your document.
![]()
This will validate the whole document.

This will validate the current page in your document.
This will validate the whole document.
CTRL+F5
You will be taken to the HTML Editor. The bottom window shows the errors that exist on the current page.
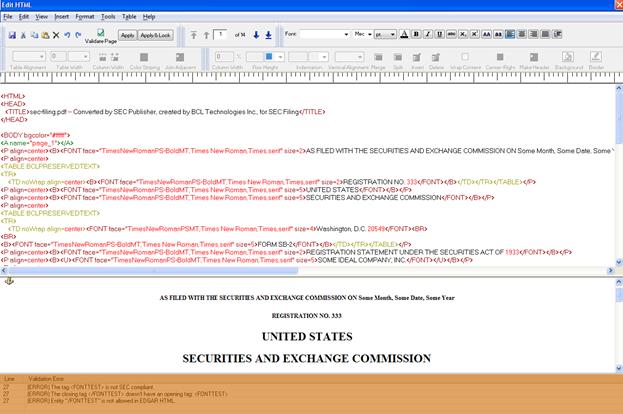
Double clicking on an error item will take you to the exact line of code where the problem is. Once you fix the problem(s), click on the Validate button again to re-validate the page. Once all the errors in the current page are fixed, click on File > Apply and Lock. Locking a page ensures that all the editing that you have done on the current page remains unaffected by future changes in the Conversion Options.
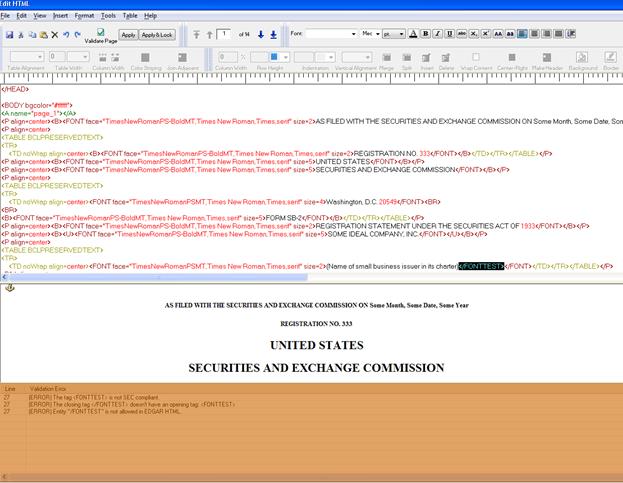
Warning: Using validation within the editor will only validate the current page. It is highly recommended that you validate the whole document before you file it.
Once you are back to the Main Workspace, click on the Validate button in the Workflow Window. This will run validation on the whole document and will automatically remove the validation frame on the right side, if no further errors are detected.
To save a project, click Save Project from the following menu or toolbar, or use the keyboard shortcut:
File > Save Project
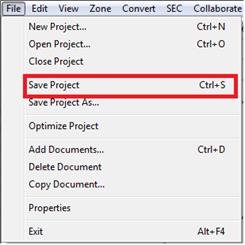
![]()
CTRL+S
The project will be saved under a ‘.secpr’ file extension.
Tip: After closing the project, all files are saved as part of the project file (*.secpr).
In order to have the EDGARized file available after closing the project, you will need to select the appropriate options (see ‘Make EDGARized Files Available’ for more details).
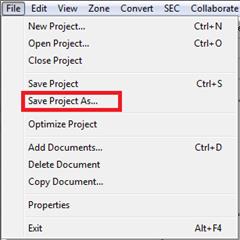
To save a project under a different name, choose File > Save Project As.
Click on File-to-SEC from the following menu or toolbar, or use the keyboard shortcut to finalize your work:
SEC > File-to-SEC…
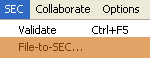
![]()
(See ‘File-to-SEC’ for more information.)
Related Topics
©1999-2022 BCL Technologies. All Rights Reserved. Unauthorized duplication or distribution prohibited.
| Converted from CHM to HTML with chm2web Standard 2.85 (unicode) |