Warning: This step is intended for an advanced user who needs to fine-tune the conversion process.
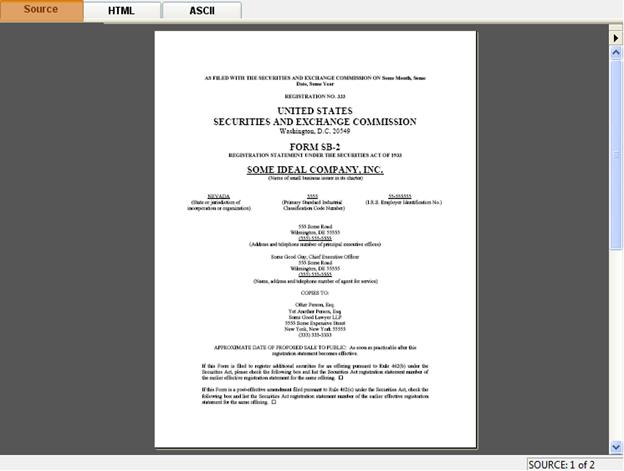
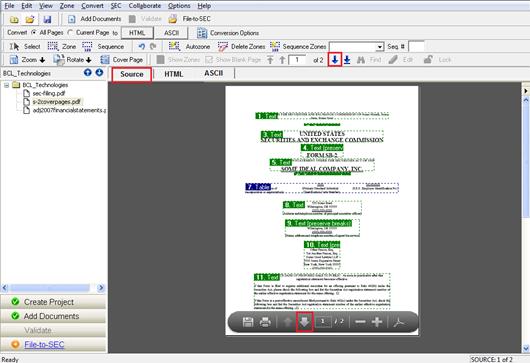
Click on the Source Tab to view the Document Preparation Options.
There are two main steps involved in preparing your documents for conversion:
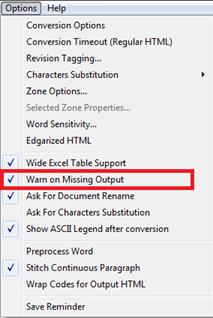
If you want SEC Publisher to automatically detect and prompt up a dialog box for un-zoned document, go to the dropdown menu, select Options > Warn for Missing output, and check Warn for Missing Output.
If you select Add without zoning or conversion when adding a document into a project, the document(s) will be imported into the project, but SEC Publisher will leave the zoning and conversion up to you. You will see the following dialog box after adding the document or when you go to the specified document:
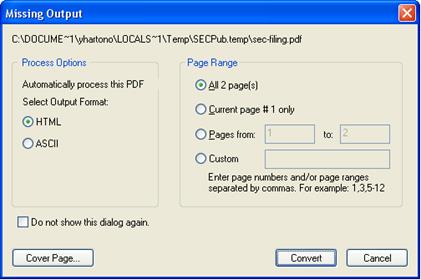
Select output format (HTML or ASCII)
This option will automatically convert the specified pages to the selected output format. The options are:
i. HTML
ii. ASCII
a.
All pages
This option will convert all pages of the document.
b.
Current page
only
This option will convert the current page only.
c.
Pages
from…to…
This option will convert a specified range of pages.
d.
Custom
This option will convert pages specified by individual or range of
page numbers.
If selected, you will not be prompted with this dialog box in the future.
Select this option to specify whether a document has cover page (see ‘Cover Page’ for more details.)
Select this option to convert the document.
Select this option if you do not want to convert the document.
If you want to zone or re-zone the document, you can use Autozone to automatically create Conversion Zones in the document and overwrite existing zones.
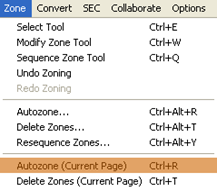
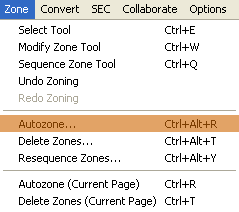
Click Autozone from the following menu or toolbar, or use the keyboard shortcut:
Zone > Autozone…

o Toolbar Menu:
![]()
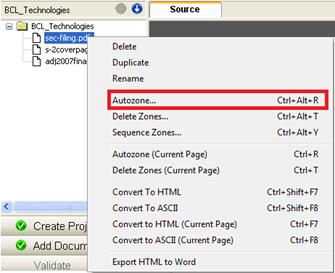
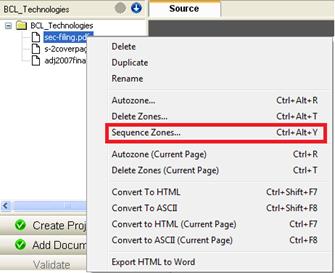
o Project Window:
If you do not see the project window, go to the drop down menu and check View > Project or press F9.
Right click on the document and click Autozone…
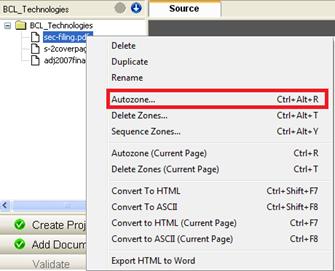
CTRL+ALT+R
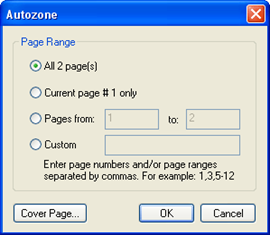
The following dialog box will appear:
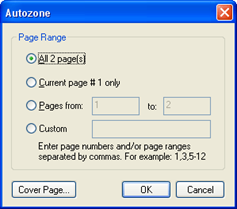
This option allows you to zone the whole document.
This option allows you to zone the current page.
This option allows you to zone a specified page range.
This option allows you to zone specific pages.
Select this option to specify whether a document has cover page (see ‘Cover Page’ for more details.)
Select this option to zone the document.
Select this option if you do not wish to zone the document.
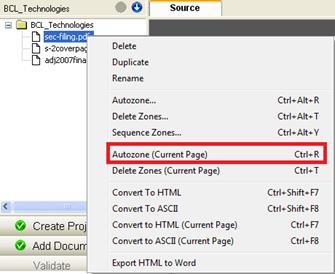
If you only wish to zone or re-zone the current page of the document, click Autozone (Current Page) from the following menu or toolbar, or use the keyboard shortcut:
Zone > Autozone (Current Page)
o Project Window:
If you do not see the project window, go to the drop down menu and check View > Project or press F9.
Right click on the document and click Autozone (Current Page)

CTRL+R
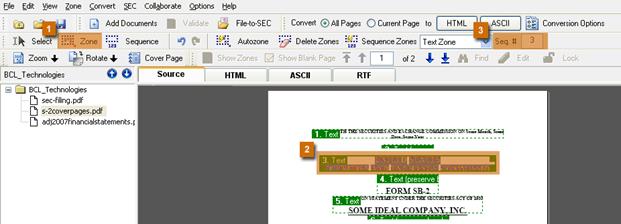
SEC Publisher uses Conversion Zones to accurately extract the content from your original document and lay the content down into the output document (EDGAR HTML or EDGAR ASCII). Each Conversion Zone has a Zone Type (indicated on the upper-left-hand corner of a zone) that tells specifically how SEC Publisher should convert the content inside the zone. The more accurate the Zone Type is, the more accurate the output is going to be. SEC Publisher ignores un-zoned areas.
There are 5 types of Conversion Zones:
You can resize any zone by clicking in the zone, then clicking and dragging on any side of the rectangle enclosing the zone. Resizing the zone implies changing the zone.
Tip: After you resize the zone, make sure to convert the document to EDGAR HTML/EDGAR ASCII to regenerate the EDGAR HTML or EDGAR ASCII. Simply resizing the zone does not automatically update the EDGARized file.
SEC Publisher automatically assigns a type for each zone, such as Table, Text or List. You can redefine any zone. There are three ways to do this:

Tip: After you redefine the zone, make sure to convert the document to EDGAR HTML or EDGAR ASCII to update the EDGAR HTML or EDGAR ASCII. Simply redefining the zone does not automatically update the EDGARized file.
Each Zone Type has its own set of Conversion Options that allows you to further fine-tune the conversion results.
If a document contains cover page(s), click on the Cover Page button on the toolbar menu to set-up the conversion of the cover page(s).
You also have the option to fine-tune a specific zone’s conversion option. This will only affect the selected zone. To select this option, click Modify Zone Tool from the following menu or toolbar, or use the keyboard shortcut:
Zone > Modify Zone Tool
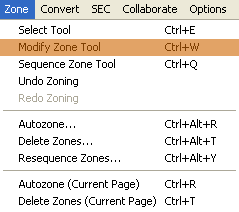
![]()
CTRL+W
Click a zone, go to the drop down menu and click Options > Selected Zone Properties…
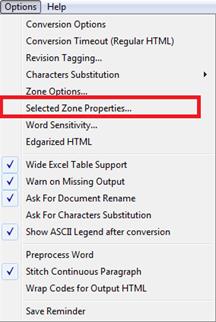
One of the following dialog boxes will appear:
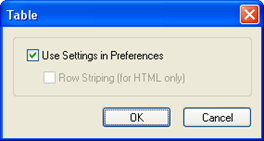
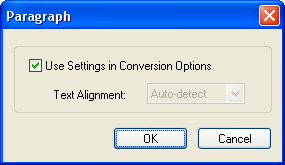
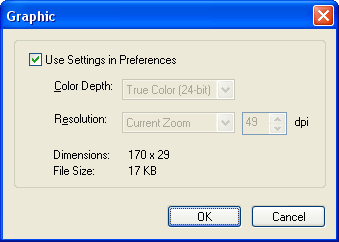
Select this option to use a default conversion options (see ‘Conversion Options’ for more information).
Unselect this option to fine-tune a selected zone’s conversion option. The specified zone type conversion option will be activated and you will be able to select a conversion option.
Tip: This conversion option will only apply to the selected zone. Other zones will still follow the default conversion option, unless specified otherwise.
SEC Publisher decides how to order the content of a page based on the sequence number of the zones. By default, SEC Publisher will automatically detect the location of a zone on a page and automatically assign a Sequence Number.
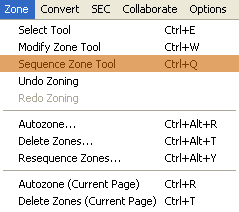
You can manually re-assign sequence number of a zone. Click Sequence Zone Tool from the following menu or toolbar, or use the keyboard shortcut:
Zone > Sequence Zone Tool
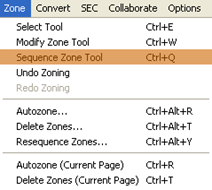
![]()
CTRL+Q
Simply click on the zones in sequential order to re-assign the zones’ sequence number.
You can also change the zone’s sequence number by following the steps below:
To revert the zone sequencing number back to the default, click Resequence Zones from the following menu or toolbar, or use the keyboard shortcut:
Zone > Resequence Zones…
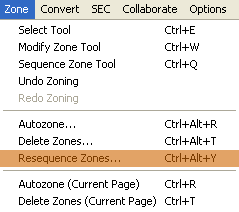
![]()
CTRL+ALT+Y
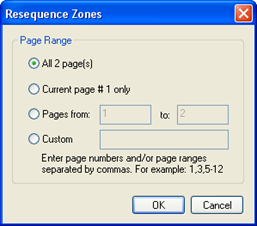
The following dialog box will appear:
|
|
a.
All pages: This
option allows you to re-sequence all pages of the
document. b. Current page # only: This option allows you to re-sequence current page.
c. Pages from…to…: This option allows you to re-sequence page range.
d. Custom: This option allows you to re-sequence specific pages.
e. OK: Select this option to revert the zone sequencing number back to the default.
f. Cancel: Select this option to keep the current zone sequencing number.
|
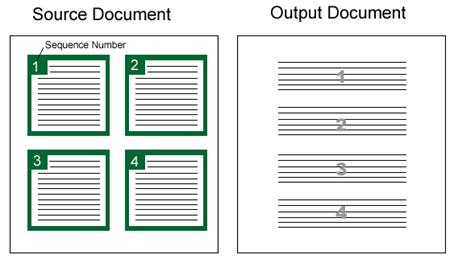
SEC Publisher uses the Sequence Number to layout the content correctly in the Output Document.
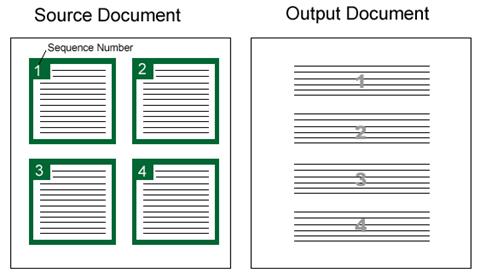
Tip: Each Zone is numbered. This indicates the sequence in which the HTML or ASCII is to be created.
Overview of the Zone Functions in the Toolbar
Select this function to re-position a page on the screen (especially useful when a page is zoomed in). Click Select Tool from the following menu or toolbar, or use the keyboard shortcut:
o Drop Down Menu:
Zone > Select Tool

o Toolbar Menu:
![]()
o Keyboard Shortcut:
CTRL+E
Select this function to do the following:
Click on a zone to select it.
Click and hold the cursor anywhere on the screen, then drag the cursor to make a Conversion Zone. The content inside the zone will be a target for conversion.
Click Modify Zone Tool from the following menu or toolbar, or use the keyboard shortcut:
Zone > Modify Zone Tool
![]()
CTRL+W
This function will automatically create Conversion Zones in the document and may overwrite existing zones.
Click Autozone… from the following menu or toolbar, or use the keyboard shortcut:
Zone > Autozone…
![]()
If you do not see the project window, go to the drop down menu and check View > Project or press F9.
Right click on the document and click Autozone….
CTRL+ALT+R
The following dialog box will appear:
Select this option to create conversion zones for all pages in the document.
Select this option to create conversion zones for the current page only.
Select this option and fill in the page number to create conversion zones for the page range that you specify.
Select this option and enter the preferred page number(s) to create conversion zones from the specified page(s).
Select this option to specify whether a document has cover page (see ‘Cover Page’ for more details).
Select this option to zone the document.
Select this option if you do not wish to zone the document.
SEC Publisher can also automatically create Conversion Zones in the current page of the document and may overwrite existing zones.
Click Autozone (Current Page) from the following men or, toolbar, or use the keyboard shortcut:
Zone > Autozone (Current Page)
If you do not see the project window, go to the drop down menu and check View > Project or press F9.
Right click on the document and click Autozone (Current Page).
CTRL+R
Sequence Zone Tool
SEC Publisher decides how to order the content of a page based on the zones' sequence numbers. To manually sequence the zones in a page, follow these steps below:
Zone > Sequence Zone Tool
![]()
CTRL+Q
To revert the zone sequencing number back to the default, click Resequence Zones from the following menu or toolbar, or use the keyboard shortcut:
Zone > Resequence Zones…
![]()
If you do not see the project window, go to the drop down menu and check View > Project or press F9.
Right click on the document and click Sequence Zones….
CTRL+ALT+Y
The following dialog box will appear:

This option allows you to re-sequence the whole document.
This option allows you to re-sequence the current page.
This option allows you to re-sequence the specified page range.
This option allows you to re-sequence specific page(s) of the document.
Select this option to revert the zone sequencing number back to the default.
Select this option to keep the current zone sequencing number.
To automatically remove Conversion Zones from the document, click Delete Zones from the following menu or toolbar, or use the keyboard shortcut:
Zone > Delete Zones…

![]()
Right click on the document and click Delete Zones….
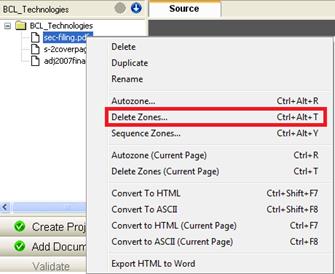
CTRL+ALT+T
The following dialog box will appear:
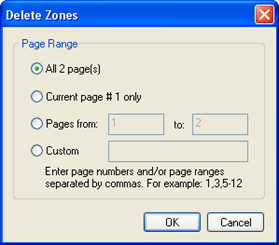
1.
All pages
This option allows you to delete the zones from the entire
document.
2.
Current page
only
This option allows you to delete the zones from the current
page.
3.
Pages
from…to…
This option allows you to delete the zones from the specified page
range.
4.
Custom
This option allows you to delete the zones from specific page(s) of
the document.
5.
OK
Select this option to remove conversion zones.
6.
Cancel
Select this option to keep the current conversion zones.
SEC Publisher can also automatically remove Conversion Zones in the current page of the document.
Click Delete Zones (Current Page) from either the following menu:
Zone > Delete Zones (Current Page)
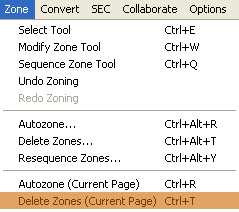
Right click on the document and click Delete Zones (Current Page).
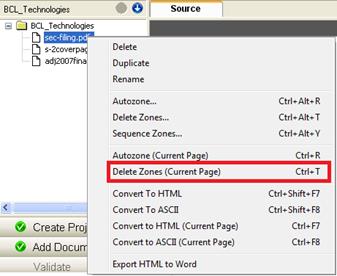
CTRL+T
Remember that un-zoned contents will be ignored during the conversion process.
To undo the last step that you performed, click Undo Zoning from either the following menu or toolbar:
Zone > Undo Zoning
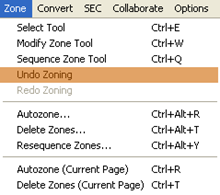
![]()
Tip: You can only undo one level of change.
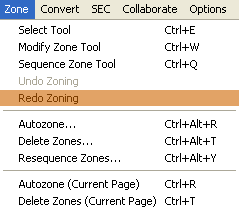
To redo the last step that you performed, click Redo Zoning from either the following menu or toolbar:
Zone > Redo Zoning
This function will only be displayed if you undo your previous step.
![]()
Tip: You can only redo one level of change.
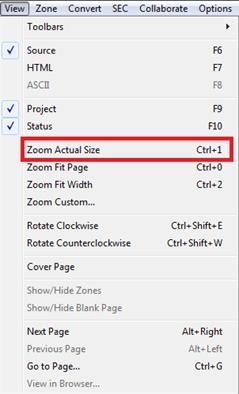
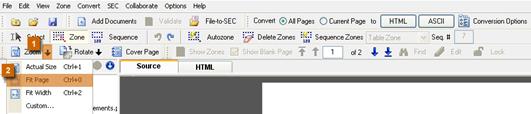
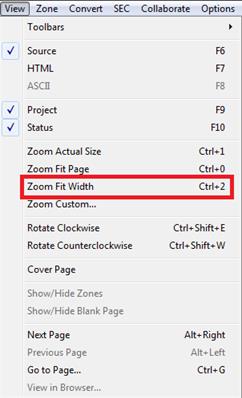
Click Zoom from the following menu or toolbar, or use the keyboard shortcut to access these functions:
o Drop Down Menu:
View > Zoom Actual Size
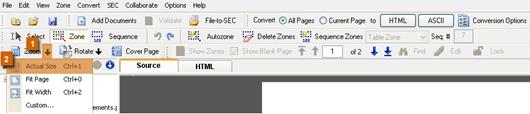
o Toolbar Menu:
![]()
or
o Keyboard Shortcut:
CTRL+1
o Drop Down Menu:
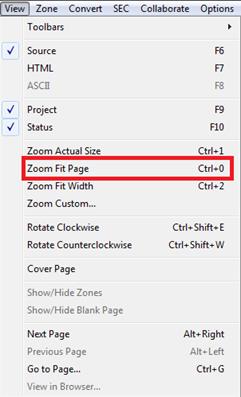
o Toolbar Menu:
o Keyboard Shortcut:
CTRL+0
o Drop Down Menu:
View > Zoom Fit Width
o Toolbar Menu:
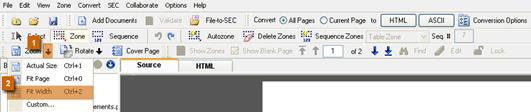
o Keyboard Shortcut:
CTRL+2
o Drop Down Menu:
View > Zoom Custom

o Toolbar Menu:
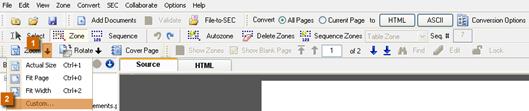
The following dialog box will appear:
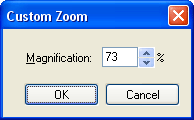
Specify the magnification percentage then click ‘OK’ to continue or ‘Cancel’ to abort.
Click Rotate from the following menu or toolbar, or use the keyboard shortcut to access these functions:
View > Rotate Clockwise
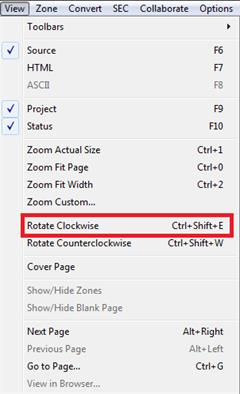
![]()
or

CTRL+Shift+Plus (+)
View > Rotate Counterclockwise
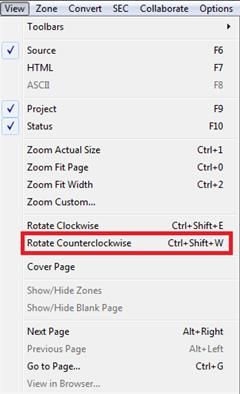

CTRL+Shift+Minus (-)
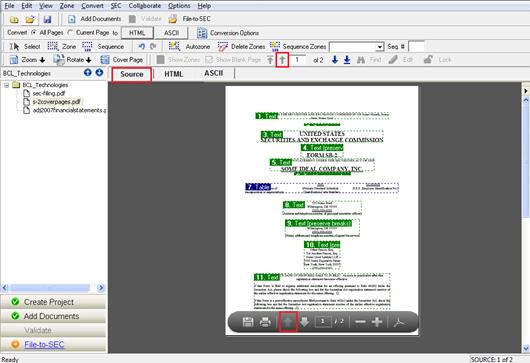
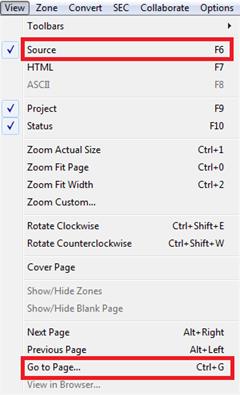
Click Page Navigation from the following menu or toolbar, or use the keyboard shortcut to access these functions:

View > Previous Page
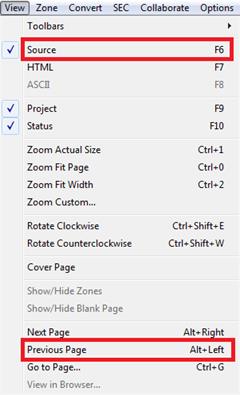
ALT+Left
View > Go To Page…
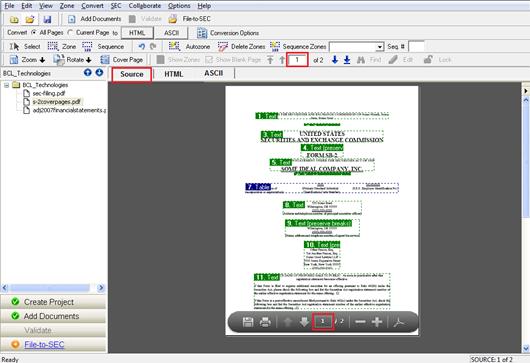
The following dialog box will appear:
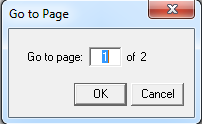
Fill in the page that you want to go to and click ‘OK’ to continue.
View > Next Page
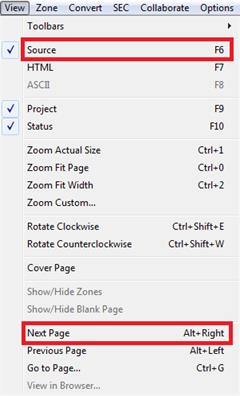
ALT+Right
To view and modify the Zone Type of a particular zone:
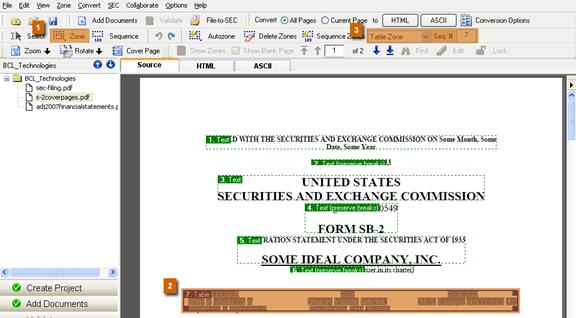
To change the selected Zone's Type into Text - Preserve line breaks, click on the drop-down list on the Toolbar Menu and select Text - Preserve line breaks. The Zone Type label changes to Text - Preserve line breaks and zone border color becomes green. SEC Publisher will now treat the content inside that zone as Text, with the line breaks preserved.
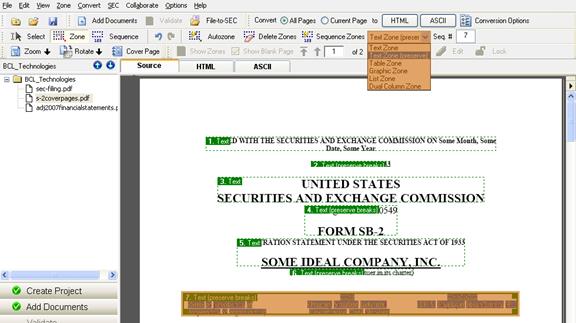
To change the zone’s sequence number, fill in the Seq. # and press ‘Enter’. SEC Publisher will change the conversion sequence number according to your specification.
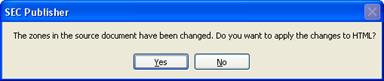
After you change the ‘Zone Type’ and ‘Sequence number’, click on the HTML tab to switch back to the HTML output view. SEC Publisher will automatically detect that you have just made changes to one or more zones, and ask to re-generate the HTML for the current page. Simply click ‘Yes’ to continue.
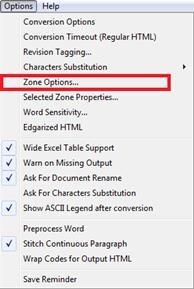
Click Zone Options from the following menu:
Options > Zone Options…
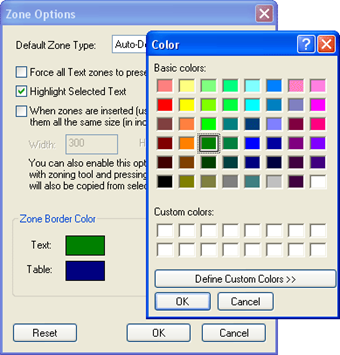
The following dialog box will appear:
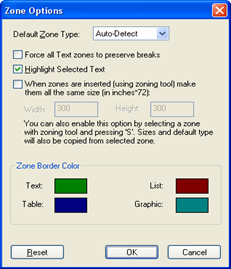
Select the Default Zone Type when creating zones using the ‘Modify Zone Tool’.
![]()
This option should be set to ‘Auto-Detect’.
Check this option to force all text zones to preserve breaks.
Use this option to highlight the text inside the selected conversion zone.
If you need to create same-size Conversion Zones, click on When zones are inserted (using zoning tool) make them all the same size and specify the width and height. Then on the workspace, select the Modify Zone Tool and click anywhere on the page to create the zone.
Click on the color to customize the color of the zones. Click ‘OK’ to continue or ‘Cancel’ to abort.
Word Sensitivity
Warning: These options are for advanced users only. We recommend not changing any of these pre-defined values.
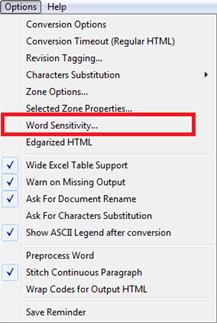
Click Word Sensitivity from the following menu:
Options > Word Sensitivity…
The following dialog box will appear:
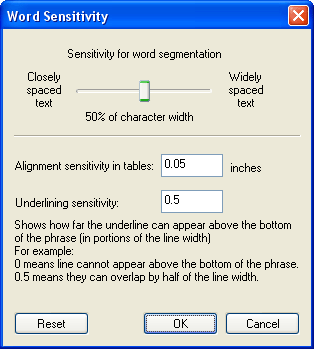
Sometimes there can be special fonts that produce either a sparsely spaced phrase (the characters are spaced further from each other within the same word) or a highly dense phrase (the characters are too close to each other within a word). This is an option to fine-tune the extraction of these types of phrases. For example, a value of 60% means that characters spaced within 60% of the character width will be merged to create a single word. If they are spaced by more than 60%, then they will be split (i.e. they produce two words).
This allows SEC Publisher to identify cell indentations within tables.
This allows SEC Publisher to differentiate between underlines and strikethroughs. The number inside the cell is a relative number of spacing between the text and the underline. For example, a value of 0.4 means that a line will be considered to be an underline as long as it does not overlap the text by less than 40% of the line width. If the overlap is more than 40%, the line will be considered to be a strikethrough.
Click this button to change the options back to the default selection.
If the first page or the first two pages of the document are cover pages, you can tell SEC Publisher to specifically treat those pages as cover pages. This process will dramatically improve the conversion output.
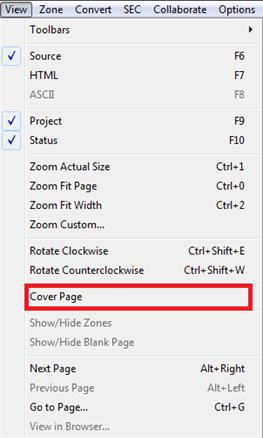
Click Cover Page from the following menu or toolbar, or use the keyboard shortcut to select the type of cover page in the document:
View > Cover Page
The following dialog box will appear:
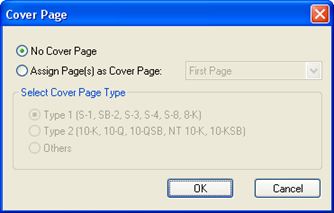
Select this option if the document does not have cover page(s).
Select this option to let SEC Publisher know that there is a cover page. The options to mark which page(s) contain the cover page and to select the cover page type will be available when this is checked.
This section contains options for different types of cover pages.
This type is reserved for S-1, SB-2, S-3, S-4, S-8, and 8-K filings.
This type is reserved for 10-K, 10-Q, 10-QSB, NT 10-K, and 10-KSB filings.
This type is for cover pages for filings other than the ones covered in Type 1 and Type 2.
In the process of reassigning a page as a cover page, SEC Publisher needs to recreate the Conversion Zones in that page. If zones exist, they will be overwritten with new zones specifically designed to convert cover pages.
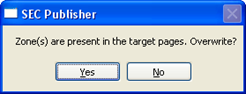
Click ‘Yes’ to continue or ‘No’ to cancel.
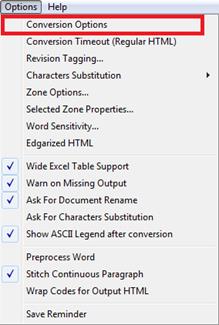
Click Conversion Options from the following menu or toolbar, or use the keyboard shortcut:
Options > Conversion Options

![]()
Shift+F7 for HTML Conversion Options
Shift+F8 for ASCII Conversion Options
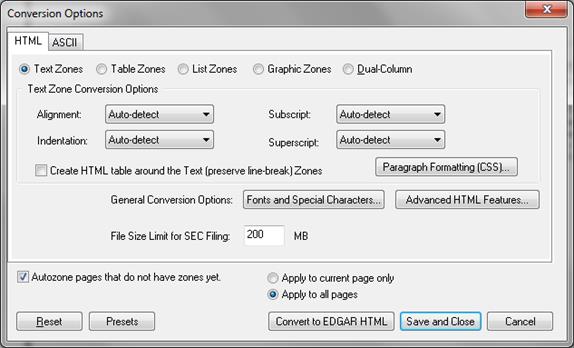
The following dialog box will appear:

Each Conversion Output (HTML or ASCII) has its own set of Zone Types. And each Zone Type (Text, Table, List, Dual-Column and Graphics) has a set of Conversion Options that governs how the content in the zone is converted. For example, there is an option to force all text alignment to the left (see the illustration below).
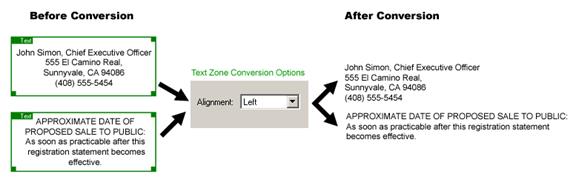
If you want to force all text in the document to be Left Aligned, you will need to modify the ‘Text Zone Conversion Options’.
(See ‘Conversion Options Overview’ to learn more.)
After zones are created, you can start working on the Conversion Options by clicking on the desired output format:
Tip: These are global options that will be used for converting all the documents in SEC Publisher.
If you try to convert an un-zoned document, the following dialog box will appear:
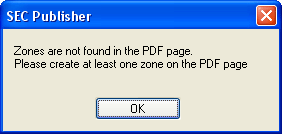
(See ‘Creating Zones’ for more details on how to zone a document.)
Click Conversion Options from the following menu or toolbar, or use the keyboard shortcut to access all EDGAR HTML Conversion Options:
Options > Conversion Options

![]()
Shift+F7
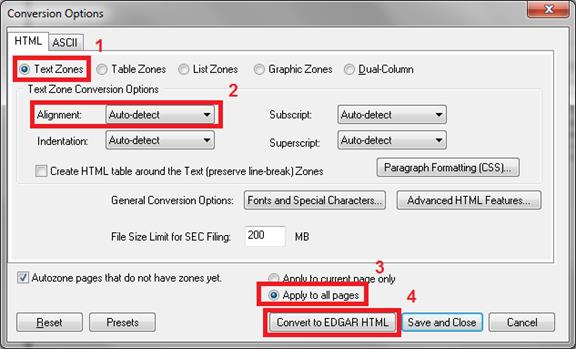
The following dialog box will appear:

Select this option to automatically zone the pages that do not have zones yet. If you do not select this option and the specified page of the document do not have zones, the following dialog box will appear:
Select this option to apply the changes to the current page of the document.
Select this option to apply the changes to all pages of the document.
Click this button to change the options back to the default selection.
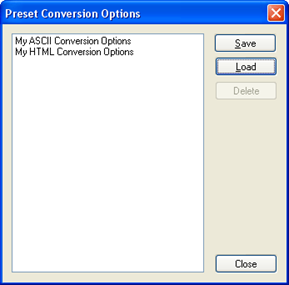
Click this button to open a menu of saved conversion options. When pressed, the following menu appears:

Click this button to preserve the current set of options. The following dialog box will appear:
Specify file name and click ‘Save’ to continue or ‘Cancel’ to abort.
Select a file name and click ‘Load’ button to load a saved set of options.
Select a file name and click this button to delete a saved set of options.
Click this button to continue.
Click this button to start converting the document into EDGAR HTML using the current set of options. At least one zone has to be present in the page(s) to be converted.
Click this button to save the current set of options and close the menu.
Click this button to close the EDGAR HTML Conversion Option.
You also have the option to convert your document directly to EDGAR HTML without accessing the EDGAR HTML Conversion Options Menu. Click Convert to HTML from the following menu or toolbar, or use the keyboard shortcut:
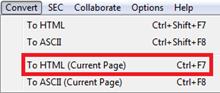
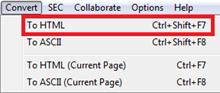
o Drop Down Menu:
Convert > To HTML

o Toolbar Menu:
![]()
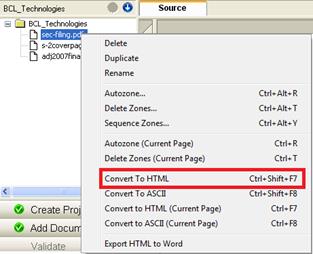
o Project Window:
If you do not see the project window, go to the drop down menu and check View > Project or press F9.
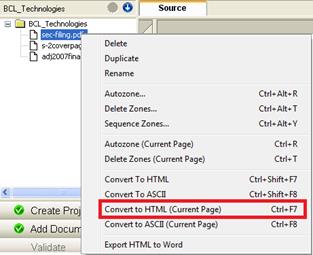
Right click on the document and click Convert to HTML.
o Keyboard Shortcut:
CTRL+ALT+F7
o Drop Down Menu:
Convert > To HTML (Current Page)
o Toolbar Menu:
![]()
o Project Window:
If you do not see the project window, go to the drop down menu and check View > Project or press F9.
Right click on the document and click Convert To HTML (Current Page).
o Keyboard Shortcut:
CTRL+F7
o Drop Down Menu:
Convert > To HTML
o Project Window:
If you do not see the project window, go to the drop down menu and check View > Project or press F9.
Right click on the document and click Convert to HTML.
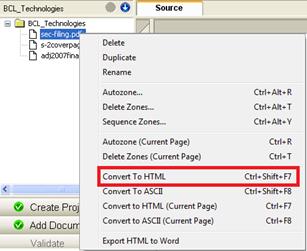
o Keyboard Shortcut:
CTRL+ALT+F7
The following dialog box will appear:
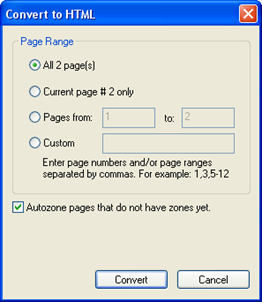
a. All pages
Select this option to convert the whole document to EDGAR HTML.
b. Current page only
Select this option to convert only the current page to EDGAR HTML.
c. Pages from … to…
Select this option and enter the page range to convert the specified page range to EDGAR HTML.
d. Custom
Select this option and enter the pages that you want to convert to EDGAR HTML.
e. Autozone pages that do not have zones yet
Select this option to automatically zone the pages that do not have zones yet. If you do not select this option and the specified page of the document does not have zones, the following dialog box will appear:
f. Convert
Click this button to convert the document to EDGAR HTML.
g. Cancel
Click this button if you do not wish to convert the document to EDGAR HTML.
Click Conversion Options from the following menu or toolbar, or use the keyboard shortcut to access all EDGAR ASCII Conversion Options:
Options > Conversion Options
![]()
Shift+F8
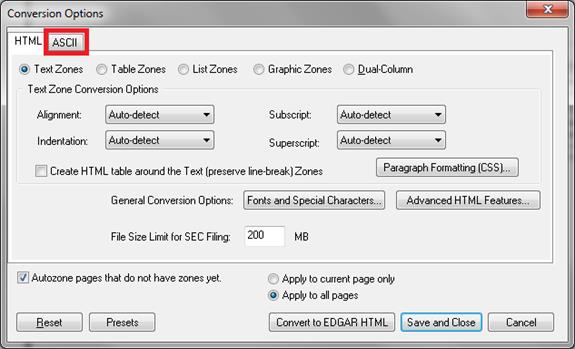
The following dialog box will appear:
Click the ASCII Tab.
Select this option to automatically zone the pages that do not have zones yet. If you do not select this option and the specified page(s) of the document do not have zones, the following dialog box will appear:

Select this option to apply the changes to the current page of the document.
Select this option to apply the changes to all pages of the document.
Click this button to change the options back to the default selection.
Click this button to bring up the following menu:
Click this button to preserve the current set of options. The following dialog box will appear:

Specify file name and click ‘Save’ to save it.
Load
Select a file name and click Load button to load a saved set of options.
Delete
Select a file name and click this button to delete a saved set of options.
Click this button to continue.
Click this button to start converting the document into EDGAR ASCII using the current set of options. At least one zone has to be present in the document.
Click this button to save the current set of options and close the menu.
Click this button to close the EDGAR ASCII Conversion Option.
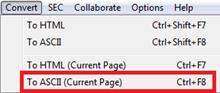
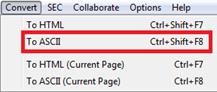
You also have the option to convert their document directly to EDGAR ASCII without accessing the EDGAR ASCII Conversion Options. Click Convert to ASCII from the following menu or toolbar, or use the keyboard shortcut:
o Drop Down Menu:
Convert > To ASCII

o Toolbar Menu:
![]()
o Project Window:
If you do not see the project window, go to the drop down menu and check View > Project or press F9.
Right click on the document and click Convert To ASCII.
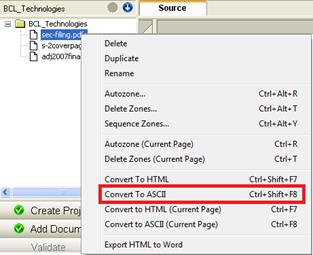
o Keyboard Shortcut:
CTRL+ALT+F8
o Drop Down Menu:
Convert > To ASCII (Current Page)
o Toolbar Menu:
![]()
o Project Window:
If you do not see the project window, go to the drop down menu and check View > Project or press F9.
Right click on the document and click Convert to ASCII (Current Page).
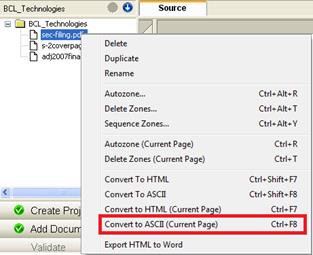
o Keyboard Shortcut:
CTRL+F8
o Drop Down Menu:
Convert > To ASCII
o Project Window:
If you do not see the project window, go to the drop down menu and check View > Project or press F9.
Right click on the document and click Convert To ASCII.
o Keyboard Shortcut:
CTRL+ALT+F8
The following dialog box will appear:
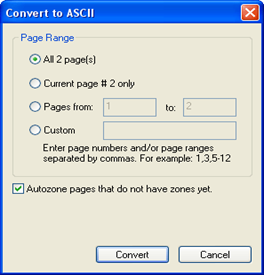
a. All pages
Select this option to convert the whole document to EDGAR ASCII.
b. Current page only
Select this option to convert only the current page to EDGAR ASCII.
c. Pages from … to…
Select this option to convert the specified page range to EDGAR ASCII.
d. Custom
Select this option and enter the pages that you want to convert to EDGAR ASCII.
e. Autozone pages that do not have zones yet
Select this option to automatically zone the pages that do not have zones yet. If you do not select this option and the specified page(s) of the document do not have zones, the following dialog box will appear:
f. Convert
Click this button to convert the document to EDGAR ASCII.
g. Cancel
Click this button if you do not wish to convert the document to EDGAR ASCII.
Related Topics
©1999-2022 BCL Technologies. All Rights Reserved. Unauthorized duplication or distribution prohibited.
| Converted from CHM to HTML with chm2web Standard 2.85 (unicode) |